<h1 style="font-size: 32px; font-weight: bold; border-bottom: 2px solid rgb(204, 204, 204); padding: 0px 4px 0px 0px; text-align: left; margin: 0px 0px 10px;">LUT 图像灰度调整</h1><p>视频讲解如下:</p><p><embed src="//player.bilibili.com/player.html?aid=686053099&bvid=BV1PU4y1i76w&cid=776993896&page=1&high_quality=1&danmaku=0" width="817" height="460" wmode="transparent" play="true" loop="false" menu="false" allowscriptaccess="never" allowfullscreen="true"/></p><p><br/></p><p style="white-space: normal;">在本章节中给大家演示如何利用LUT来对图像进行灰度调整。</p><p style="white-space: normal;">本章节同样还是采用毛星云的C++代码框架。</p><p style="white-space: normal;"><br/></p><p style="margin-top: 0px; margin-bottom: 10px; white-space: normal; padding: 0px; list-style: none; border: 0px; overflow-wrap: break-word; word-break: break-all; line-height: 1.5em; font-family: "Helvetica Neue", Helvetica, "PingFang SC", "Hiragino Sans GB", "Microsoft YaHei", "Noto Sans CJK SC", "WenQuanYi Micro Hei", Arial, sans-serif; color: rgb(51, 51, 51); box-sizing: border-box;">当前系列所有demo下载地址:</p><p style="margin-top: 0px; margin-bottom: 10px; white-space: normal; padding: 0px; list-style: none; border: 0px; overflow-wrap: break-word; word-break: break-all; line-height: 1.5em; font-family: "Helvetica Neue", Helvetica, "PingFang SC", "Hiragino Sans GB", "Microsoft YaHei", "Noto Sans CJK SC", "WenQuanYi Micro Hei", Arial, sans-serif; color: rgb(51, 51, 51); box-sizing: border-box;"><a href="https://github.com/GaoRenBao/OpenCv4-Demo" target="_blank" style="margin: 0px; padding: 0px; list-style: none; border: 0px; color: rgb(0, 102, 0); transition-duration: 0.2s; transition-property: opacity; outline: none; opacity: 0.8;">https://github.com/GaoRenBao/OpenCv4-Demo</a></p><p style="margin-top: 0px; margin-bottom: 10px; text-wrap: wrap; padding: 0px; list-style: none; border: 0px; overflow-wrap: break-word; word-break: break-all; line-height: 1.5em; font-family: "Helvetica Neue", Helvetica, "PingFang SC", "Hiragino Sans GB", "Microsoft YaHei", "Noto Sans CJK SC", "WenQuanYi Micro Hei", Arial, sans-serif; box-sizing: border-box; color: rgb(51, 51, 51);">不同编程语言对应的OpenCv版本以及<span style="">开发环境</span>信息如下:<span style="font-family: Calibri; font-size: 14px;"> </span></p><table border="1" style="margin-left: 2px; border-right: none; border-bottom: none; border-image: initial; border-left: 1px solid rgb(102, 102, 102); border-top: 1px solid rgb(102, 102, 102);"><tbody><tr class="firstRow"><td width="81" valign="top" style="border-color: windowtext rgb(102, 102, 102) rgb(102, 102, 102) windowtext; border-bottom-width: 1px; border-bottom-style: solid; border-right-width: 1px; border-right-style: solid; padding: 5px;"><p style="text-align: center;"><strong><span style="font-family: 宋体; font-size: 14px;">语言</span></strong></p></td><td width="223" valign="top" style="border-top-color: windowtext; border-left: none; border-bottom: 1px solid rgb(102, 102, 102); border-right: 1px solid rgb(102, 102, 102); padding: 5px;"><p style="text-align: center;"><strong><span style="font-family: Calibri; font-size: 14px;">OpenCv</span></strong><strong><span style="font-family: 宋体; font-size: 14px;">版本</span></strong></p></td><td width="242" valign="top" style="border-top-color: windowtext; border-left: none; border-bottom: 1px solid rgb(102, 102, 102); border-right: 1px solid rgb(102, 102, 102); padding: 5px;"><p style="text-align: center;"><strong><span style="font-family: Calibri; font-size: 14px;">IDE</span></strong></p></td><td width="128" valign="top" style="border-top-color: windowtext; border-left: none; border-bottom: 1px solid rgb(102, 102, 102); border-right: 1px solid rgb(102, 102, 102); padding: 5px;"><p style="text-align: center; line-height: 21px;"><strong><span style="font-family: Helvetica; letter-spacing: 0px;">包含方法</span></strong></p></td></tr><tr><td width="81" valign="top" style="border-top: none; border-left-color: windowtext; border-bottom: 1px solid rgb(102, 102, 102); border-right: 1px solid rgb(102, 102, 102); padding: 5px;"><p><span style="font-family: Calibri; font-size: 14px;">C#</span></p></td><td width="223" valign="top" style="border-top: none; border-left: none; border-bottom: 1px solid rgb(102, 102, 102); border-right: 1px solid rgb(102, 102, 102); padding: 5px;"><p><span style="font-family: Calibri; letter-spacing: 0px;">OpenCvSharp4.4.8.0.20230708</span></p></td><td width="242" valign="top" style="border-top: none; border-left: none; border-bottom: 1px solid rgb(102, 102, 102); border-right: 1px solid rgb(102, 102, 102); padding: 5px;"><p><span style="font-family: Calibri; font-size: 14px;">Visual Studio 2022</span></p></td><td width="128" valign="top" style="border-top: none; border-left: none; border-bottom: 1px solid rgb(102, 102, 102); border-right: 1px solid rgb(102, 102, 102); padding: 5px;"><p style="line-height: 21px;"><span style="font-family: 宋体; letter-spacing: 0px;">SURF和SIFT</span></p></td></tr><tr><td width="81" valign="top" style="border-top: none; border-left-color: windowtext; border-bottom: 1px solid rgb(102, 102, 102); border-right: 1px solid rgb(102, 102, 102); padding: 5px;"><p><span style="font-family: Calibri; font-size: 14px;">C++</span></p></td><td width="223" valign="top" style="border-top: none; border-left: none; border-bottom: 1px solid rgb(102, 102, 102); border-right: 1px solid rgb(102, 102, 102); padding: 5px;"><p><span style="font-family: Calibri; letter-spacing: 0px;">O</span><span style="font-family: Calibri; letter-spacing: 0px;">pen</span><span style="font-family: Calibri; letter-spacing: 0px;">C</span><span style="font-family: Calibri; letter-spacing: 0px;">v-4.5.5-vc14_vc15</span></p></td><td width="242" valign="top" style="border-top: none; border-left: none; border-bottom: 1px solid rgb(102, 102, 102); border-right: 1px solid rgb(102, 102, 102); padding: 5px;"><p><span style="font-family: Calibri; font-size: 14px;">Visual Studio 2022</span></p></td><td width="128" valign="top" style="border-top: none; border-left: none; border-bottom: 1px solid rgb(102, 102, 102); border-right: 1px solid rgb(102, 102, 102); padding: 5px;"><p style="line-height: 21px;"><span style="font-family: 宋体; letter-spacing: 0px;">SIFT</span></p></td></tr><tr><td width="81" valign="top" style="border-top: none; border-left-color: windowtext; border-bottom: 1px solid rgb(102, 102, 102); border-right: 1px solid rgb(102, 102, 102); padding: 5px;"><p><span style="font-family: Calibri; font-size: 14px;">Python</span></p></td><td width="223" valign="top" style="border-top: none; border-left: none; border-bottom: 1px solid rgb(102, 102, 102); border-right: 1px solid rgb(102, 102, 102); padding: 5px;"><p><span style="font-family: Calibri; font-size: 14px;">OpenCv-Python (4.6.0.66)</span></p></td><td width="242" valign="top" style="border-top: none; border-left: none; border-bottom: 1px solid rgb(102, 102, 102); border-right: 1px solid rgb(102, 102, 102); padding: 5px;"><p><span style="font-family: Calibri; font-size: 14px;">PyCharm Community Edition 2022.1.3</span></p></td><td width="128" valign="top" style="border-top: none; border-left: none; border-bottom: 1px solid rgb(102, 102, 102); border-right: 1px solid rgb(102, 102, 102); padding: 5px;"><p style="line-height: 21px;"><span style="font-family: 宋体; letter-spacing: 0px;">SIFT</span></p></td></tr></tbody></table><p style="margin-top: 0px; margin-bottom: 10px; text-wrap: wrap; padding: 0px; list-style: none; border: 0px; overflow-wrap: break-word; word-break: break-all; line-height: 1.5em; font-family: "Helvetica Neue", Helvetica, "PingFang SC", "Hiragino Sans GB", "Microsoft YaHei", "Noto Sans CJK SC", "WenQuanYi Micro Hei", Arial, sans-serif; color: rgb(51, 51, 51); box-sizing: border-box;"><br/></p><p style="white-space: normal;">首先呢,博主准备了两种测试图片,一种是黑白的渐变图,另一种是彩色渐变图,两种图片的运行效果如下。</p><p style="white-space: normal;"><br/></p><p style="white-space: normal;">黑白原图如下:</p><p style="white-space: normal;"><img src="/upload/image/6379334282762829764951050.jpg" title="a.jpg" alt="a.jpg"/></p><p style="white-space: normal;"><br/></p><p style="white-space: normal;">黑白原图执行结果如下:</p><p style="white-space: normal;"><img src="/upload/image/6379334283255593612178865.jpg" title="out.jpg" alt="out.jpg"/></p><p style="white-space: normal;"><br/></p><p style="white-space: normal;">彩色图如下:</p><p style="white-space: normal;"><img src="/upload/image/6379334283732404771411080.jpg" title="b.jpg" alt="b.jpg"/></p><p style="white-space: normal;">彩色图运行效果如下:</p><p style="white-space: normal;"><img src="/upload/image/6379334284128950981355801.jpg" title="out2.jpg" alt="out2.jpg"/></p><p style="white-space: normal;"><strong style="white-space: normal; margin: 0px; padding: 0px; list-style: none; border: 0px; color: rgb(51, 51, 51); font-family: "Helvetica Neue", Helvetica, "PingFang SC", "Hiragino Sans GB", "Microsoft YaHei", "Noto Sans CJK SC", "WenQuanYi Micro Hei", Arial, sans-serif; "><span style="font-size: 16px; font-style: italic; font-weight: bold; color: rgb(51, 153, 204); line-height: 18px;">C#版本代码如下:</span></strong></p><p style="white-space: normal;"> C#版本有两种调用方式,当然也就C#版本有,C++版本和python版本只有一种调用方法。<strong style="white-space: normal; margin: 0px; padding: 0px; list-style: none; border: 0px; color: rgb(51, 51, 51); font-family: "Helvetica Neue", Helvetica, "PingFang SC", "Hiragino Sans GB", "Microsoft YaHei", "Noto Sans CJK SC", "WenQuanYi Micro Hei", Arial, sans-serif; "><br/></strong></p><pre class="brush:c#;toolbar:false">using OpenCvSharp;
namespace demo
{
internal class Program
{
static void Main(string[] args)
{
//查找表,数组的下标对应图片里面的灰度值
//例如lutData[20]=0;表示灰度为20的像素其对应的值0.
//可能这样说的不清楚仔细看下代码就清楚了。
byte[] lutData = new byte[256];
for (int i = 0; i < 256; i++)
{
if (i <= 120) lutData[i] = 0;
if (i > 120 && i <= 200) lutData[i] = 120;
if (i > 200) lutData[i] = 255;
}
Mat a = Cv2.ImRead("../../../images/1050.jpg");
Mat b = new Mat();
Mat lut = new Mat(1, 256, MatType.CV_8UC1, lutData);
Cv2.ImShow("a", a);
Cv2.LUT(a, lut, b);
//Cv2.LUT(a, lutData, b);
Cv2.ImShow("b2", b);
Cv2.WaitKey();
}
}
}</pre><p style="white-space: normal;"><strong style="white-space: normal; margin: 0px; padding: 0px; list-style: none; border: 0px; color: rgb(51, 51, 51); font-family: "Helvetica Neue", Helvetica, "PingFang SC", "Hiragino Sans GB", "Microsoft YaHei", "Noto Sans CJK SC", "WenQuanYi Micro Hei", Arial, sans-serif; "></strong><br/></p><p style="white-space: normal;"><strong style="white-space: normal; margin: 0px; padding: 0px; list-style: none; border: 0px; color: rgb(51, 51, 51); font-family: "Helvetica Neue", Helvetica, "PingFang SC", "Hiragino Sans GB", "Microsoft YaHei", "Noto Sans CJK SC", "WenQuanYi Micro Hei", Arial, sans-serif; "><strong style="margin: 0px; padding: 0px; list-style: none; border: 0px;"><span style="font-size: 16px; font-style: italic; font-weight: bold; color: rgb(51, 153, 204); line-height: 18px;">C++版本代码如下:</span></strong></strong></p><pre class="brush:cpp;toolbar:false">#include <iostream>
#include <opencv2\opencv.hpp>
#include <opencv2\highgui\highgui.hpp>
#include <windows.h>
using namespace cv;
using namespace std;
int main()
{
//查找表,数组的下标对应图片里面的灰度值
//例如lutData[20]=0;表示灰度为20的像素其对应的值0.
//可能这样说的不清楚仔细看下代码就清楚了。
uchar lutData[256];
for (int i = 0; i < 256; i++)
{
if (i <= 120)lutData[i] = 0;
if (i > 120 && i <= 200)lutData[i] = 120;
if (i > 200)lutData[i] = 255;
}
Mat lut(1, 256, CV_8UC1, lutData);
Mat a = imread("../images/1050.jpg");
Mat b;
imshow("TEST1", a);
LUT(a, lut, b);
imshow("TEST2", b);
waitKey(0);
}</pre><p style="white-space: normal;"><strong style="white-space: normal; margin: 0px; padding: 0px; list-style: none; border: 0px; color: rgb(51, 51, 51); font-family: "Helvetica Neue", Helvetica, "PingFang SC", "Hiragino Sans GB", "Microsoft YaHei", "Noto Sans CJK SC", "WenQuanYi Micro Hei", Arial, sans-serif; "><strong style="margin: 0px; padding: 0px; list-style: none; border: 0px;"></strong></strong><br/></p><p style="white-space: normal;"><strong style="white-space: normal; margin: 0px; padding: 0px; list-style: none; border: 0px; color: rgb(51, 51, 51); font-family: "Helvetica Neue", Helvetica, "PingFang SC", "Hiragino Sans GB", "Microsoft YaHei", "Noto Sans CJK SC", "WenQuanYi Micro Hei", Arial, sans-serif; "><strong style="margin: 0px; padding: 0px; list-style: none; border: 0px;"><span style="font-size: 16px; font-style: italic; font-weight: bold; color: rgb(51, 153, 204); line-height: 18px;">Python版本代码如下:</span></strong></strong></p><pre class="brush:python;toolbar:false">import cv2
import numpy as np
# 查找表,数组的下标对应图片里面的灰度值
# 例如lutData[20]=0;表示灰度为20的像素其对应的值0.
# 可能这样说的不清楚仔细看下代码就清楚了。
a = cv2.imread("../images/1050.jpg")
lut = []
for i in range(256):
if i <= 120:
lut.append(0)
if 120 < i <= 200:
lut.append(120)
if i > 200:
lut.append(255)
lut = np.array(lut).clip(0, 255).astype('uint8')
cv2.imshow("a", a)
b = cv2.LUT(a, lut)
cv2.imshow("b", b)
cv2.waitKey(0)
cv2.destroyAllWindows()</pre><p style="white-space: normal;"><br/></p>
LUT 图像灰度调整 视频讲解如下:
在本章节中给大家演示如何利用LUT来对图像进行灰度调整。
本章节同样还是采用毛星云的C++代码框架。
当前系列所有demo下载地址:
https://github.com/GaoRenBao/OpenCv4-Demo
不同编程语言对应的OpenCv版本以及开发环境 信息如下:
语言
OpenCv 版本
IDE
包含方法
C#
OpenCvSharp4.4.8.0.20230708
Visual Studio 2022
SURF和SIFT
C++
O pen C v-4.5.5-vc14_vc15
Visual Studio 2022
SIFT
Python
OpenCv-Python (4.6.0.66)
PyCharm Community Edition 2022.1.3
SIFT
首先呢,博主准备了两种测试图片,一种是黑白的渐变图,另一种是彩色渐变图,两种图片的运行效果如下。
黑白原图如下:
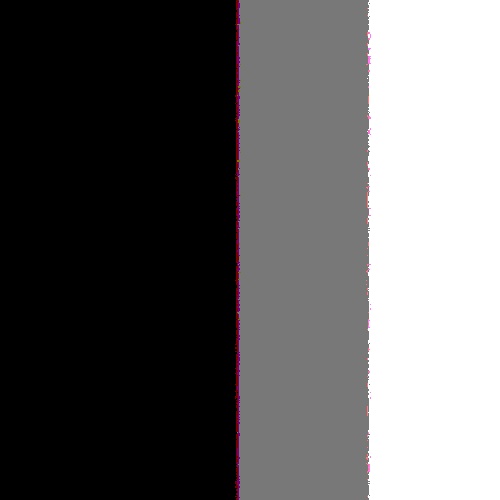
黑白原图执行结果如下:
彩色图如下:
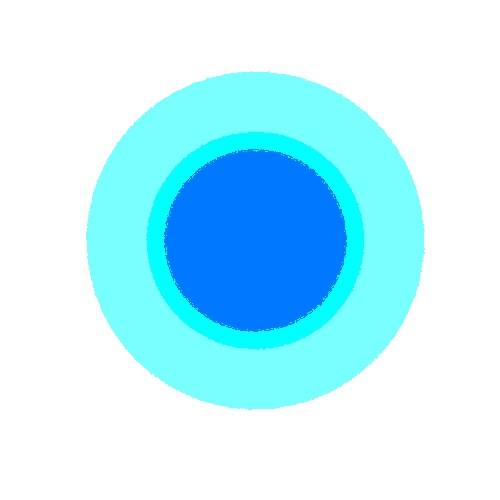
彩色图运行效果如下:
C#版本代码如下:
C#版本有两种调用方式,当然也就C#版本有,C++版本和python版本只有一种调用方法。
using OpenCvSharp;

namespace demo
{
    internal class Program
    {
        static void Main(string[] args)
        {
            //查找表,数组的下标对应图片里面的灰度值
            //例如lutData[20]=0;表示灰度为20的像素其对应的值0.
            //可能这样说的不清楚仔细看下代码就清楚了。
            byte[] lutData = new byte[256];
            for (int i = 0; i < 256; i++)
            {
                if (i <= 120) lutData[i] = 0;
                if (i > 120 && i <= 200) lutData[i] = 120;
                if (i > 200) lutData[i] = 255;
            }

            Mat a = Cv2.ImRead("../../../images/1050.jpg");
            Mat b = new Mat();
            Mat lut = new Mat(1, 256, MatType.CV_8UC1, lutData);
            Cv2.ImShow("a", a);
            Cv2.LUT(a, lut, b);
            //Cv2.LUT(a, lutData, b);
            Cv2.ImShow("b2", b);
            Cv2.WaitKey();
        }
    }
}
C++版本代码如下:
#include <iostream>
#include <opencv2\opencv.hpp>
#include <opencv2\highgui\highgui.hpp>
#include <windows.h>

using namespace cv;
using namespace std;

int main()
{
	//查找表,数组的下标对应图片里面的灰度值
	//例如lutData[20]=0;表示灰度为20的像素其对应的值0.
	//可能这样说的不清楚仔细看下代码就清楚了。
	uchar lutData[256];
	for (int i = 0; i < 256; i++)
	{
		if (i <= 120)lutData[i] = 0;
		if (i > 120 && i <= 200)lutData[i] = 120;
		if (i > 200)lutData[i] = 255;
	}

	Mat lut(1, 256, CV_8UC1, lutData);
	Mat a = imread("../images/1050.jpg");
	Mat b;

	imshow("TEST1", a);
	LUT(a, lut, b);
	imshow("TEST2", b);
	waitKey(0);
}
Python版本代码如下:
import cv2
import numpy as np

# 查找表,数组的下标对应图片里面的灰度值
# 例如lutData[20]=0;表示灰度为20的像素其对应的值0.
# 可能这样说的不清楚仔细看下代码就清楚了。
a = cv2.imread("../images/1050.jpg")

lut = []
for i in range(256):
    if i <= 120:
        lut.append(0)
    if 120 < i <= 200:
        lut.append(120)
    if i > 200:
        lut.append(255)

lut = np.array(lut).clip(0, 255).astype('uint8')

cv2.imshow("a", a)
b = cv2.LUT(a, lut)
cv2.imshow("b", b)

cv2.waitKey(0)
cv2.destroyAllWindows()


