<h1 style="font-size: 32px; font-weight: bold; border-bottom: 2px solid rgb(204, 204, 204); padding: 0px 4px 0px 0px; text-align: left; margin: 0px 0px 10px;">计算摄影学-图像去噪<br/></h1><p style="text-wrap: wrap;"><span style="color: rgba(0, 0, 0, 0.85); font-family: "Helvetica Neue", Helvetica, "PingFang SC", "Hiragino Sans GB", "Microsoft YaHei", "Noto Sans CJK SC", "WenQuanYi Micro Hei", Arial, sans-serif; ">下面这段代码是 </span><a href="/api/system/download?file=OpenCV-Python-Tutorial-%E4%B8%AD%E6%96%87%E7%89%88.pdf" target="_blank" title="OpenCV-Python-Tutorial-中文版.pdf (P288)">OpenCV-Python-Tutorial-中文版.pdf (P288)</a><span style="color: rgba(0, 0, 0, 0.85); font-family: "Helvetica Neue", Helvetica, "PingFang SC", "Hiragino Sans GB", "Microsoft YaHei", "Noto Sans CJK SC", "WenQuanYi Micro Hei", Arial, sans-serif; ">中的实现</span><br/></p><p style="margin-top: 0px; margin-bottom: 10px; text-wrap: wrap; padding: 0px; list-style: none; border: 0px; overflow-wrap: break-word; word-break: break-all; line-height: 1.5em; font-family: "Helvetica Neue", Helvetica, "PingFang SC", "Hiragino Sans GB", "Microsoft YaHei", "Noto Sans CJK SC", "WenQuanYi Micro Hei", Arial, sans-serif; color: rgb(51, 51, 51); box-sizing: border-box;">当前系列所有demo下载地址:</p><p style="margin-top: 0px; margin-bottom: 10px; text-wrap: wrap; padding: 0px; list-style: none; border: 0px; overflow-wrap: break-word; word-break: break-all; line-height: 1.5em; font-family: "Helvetica Neue", Helvetica, "PingFang SC", "Hiragino Sans GB", "Microsoft YaHei", "Noto Sans CJK SC", "WenQuanYi Micro Hei", Arial, sans-serif; color: rgb(51, 51, 51); box-sizing: border-box;"><a href="https://github.com/GaoRenBao/OpenCv4-Demo" target="_blank" style="margin: 0px; padding: 0px; list-style: none; border: 0px; color: rgb(0, 102, 0); transition-duration: 0.2s; transition-property: opacity; outline: none; opacity: 0.8;">https://github.com/GaoRenBao/OpenCv4-Demo</a></p><p style="margin-top: 0px; margin-bottom: 10px; text-wrap: wrap; padding: 0px; list-style: none; border: 0px; overflow-wrap: break-word; word-break: break-all; line-height: 1.5em; font-family: "Helvetica Neue", Helvetica, "PingFang SC", "Hiragino Sans GB", "Microsoft YaHei", "Noto Sans CJK SC", "WenQuanYi Micro Hei", Arial, sans-serif; color: rgb(51, 51, 51); box-sizing: border-box;"><a href="https://gitee.com/fuckgrb/OpenCv4-Demo" target="_blank" style="margin: 0px; padding: 0px; list-style: none; border: 0px; color: rgb(0, 102, 0); transition-duration: 0.2s; transition-property: opacity; outline: none;">https://gitee.com/fuckgrb/OpenCv4-Demo</a></p><p style="margin-top: 0px; margin-bottom: 10px; text-wrap: wrap; padding: 0px; list-style: none; border: 0px; overflow-wrap: break-word; word-break: break-all; line-height: 1.5em; font-family: "Helvetica Neue", Helvetica, "PingFang SC", "Hiragino Sans GB", "Microsoft YaHei", "Noto Sans CJK SC", "WenQuanYi Micro Hei", Arial, sans-serif; box-sizing: border-box; color: rgb(51, 51, 51);">不同编程语言对应的OpenCv版本以及<span style="">开发环境</span>信息如下:<span style="font-family: Calibri; font-size: 14px;"> </span></p><table border="1" style="text-wrap: wrap; border-right: none; border-bottom: none; border-image: initial; border-left: 1px solid rgb(102, 102, 102); border-top: 1px solid rgb(102, 102, 102);"><tbody><tr class="firstRow"><td width="81" valign="top" style="border-color: windowtext rgb(102, 102, 102) rgb(102, 102, 102) windowtext; border-bottom-width: 1px; border-bottom-style: solid; border-right-width: 1px; border-right-style: solid; padding: 5px;"><p style="text-align: center;"><strong><span style="font-family: 宋体; font-size: 14px;">语言</span></strong></p></td><td width="223" valign="top" style="border-color: windowtext rgb(102, 102, 102) rgb(102, 102, 102) windowtext; border-bottom-width: 1px; border-bottom-style: solid; border-right-width: 1px; border-right-style: solid; padding: 5px;"><p style="text-align: center;"><strong><span style="font-family: 宋体; font-size: 14px;"><span style="font-family: Calibri;">OpenCv</span>版本</span></strong></p></td><td width="242" valign="top" style="border-color: windowtext rgb(102, 102, 102) rgb(102, 102, 102) windowtext; border-bottom-width: 1px; border-bottom-style: solid; border-right-width: 1px; border-right-style: solid; padding: 5px;"><p style="text-align: center;"><strong><span style="font-family: 宋体; font-size: 14px;"><span style="font-family: Calibri;">IDE</span></span></strong></p></td></tr><tr><td width="81" valign="top" style="border-top: none; border-left-color: windowtext; border-bottom: 1px solid rgb(102, 102, 102); border-right: 1px solid rgb(102, 102, 102); padding: 5px;"><p><span style="font-family: 宋体; font-size: 14px;"><span style="font-family: Calibri;">C#</span></span></p></td><td width="223" valign="top" style="border-top: none; border-left-color: windowtext; word-break: break-all; border-bottom: 1px solid rgb(102, 102, 102); border-right: 1px solid rgb(102, 102, 102); padding: 5px;"><p><span style="font-family: Calibri; letter-spacing: 0px;">OpenCvSharp4.4.8.0.20230708</span></p></td><td width="242" valign="top" style="border-top: none; border-left-color: windowtext; border-bottom: 1px solid rgb(102, 102, 102); border-right: 1px solid rgb(102, 102, 102); padding: 5px;"><p><span style="font-family: 宋体; font-size: 14px;"><span style="font-family: Calibri;">Visual Studio 2022</span></span></p></td></tr><tr><td width="81" valign="top" style="border-top: none; border-left-color: windowtext; border-bottom: 1px solid rgb(102, 102, 102); border-right: 1px solid rgb(102, 102, 102); padding: 5px;"><p><span style="font-family: 宋体; font-size: 14px;"><span style="font-family: Calibri;">C++</span></span></p></td><td width="223" valign="top" style="border-top: none; border-left-color: windowtext; word-break: break-all; border-bottom: 1px solid rgb(102, 102, 102); border-right: 1px solid rgb(102, 102, 102); padding: 5px;"><p><span style="font-family: 宋体; letter-spacing: 0px;"><span style="font-family: Calibri;">O</span></span><span style="font-family: Calibri; letter-spacing: 0px;">pen</span><span style="font-family: 宋体; letter-spacing: 0px;"><span style="font-family: Calibri;">C</span></span><span style="font-family: Calibri; letter-spacing: 0px;">v-4.5.5-vc14_vc15</span></p></td><td width="242" valign="top" style="border-top: none; border-left-color: windowtext; border-bottom: 1px solid rgb(102, 102, 102); border-right: 1px solid rgb(102, 102, 102); padding: 5px;"><p><span style="font-family: 宋体; font-size: 14px;"><span style="font-family: Calibri;">Visual Studio 2022</span></span></p></td></tr><tr><td width="81" valign="top" style="border-top: none; border-left-color: windowtext; border-bottom: 1px solid rgb(102, 102, 102); border-right: 1px solid rgb(102, 102, 102); padding: 5px;"><p><span style="font-family: 宋体; font-size: 14px;"><span style="font-family: Calibri;">Python</span></span></p></td><td width="223" valign="top" style="border-top: none; border-left-color: windowtext; border-bottom: 1px solid rgb(102, 102, 102); border-right: 1px solid rgb(102, 102, 102); padding: 5px;"><p><span style="font-family: 宋体; font-size: 14px;"><span style="font-family: Calibri;">OpenCv-Python (4.6.0.66)</span></span></p></td><td width="242" valign="top" style="border-top: none; border-left-color: windowtext; border-bottom: 1px solid rgb(102, 102, 102); border-right: 1px solid rgb(102, 102, 102); padding: 5px;"><p><span style="font-family: 宋体; font-size: 14px;"><span style="font-family: Calibri;">PyCharm Community Edition 2022.1.3</span></span></p></td></tr></tbody></table><p style="text-wrap: wrap;"><br/></p><p><span style="text-wrap: nowrap;"><span style="text-wrap: nowrap; font-size: 16px; font-style: italic; font-weight: bold; line-height: 18px;">目标</span></span></p><p><span style="text-wrap: nowrap;">• 学习使用非局部平均值去噪算法去除图像中的噪声</span></p><p><span style="text-wrap: nowrap;">• 学习函数 cv2.fastNlMeansDenoising() cv2.fastNlMeansDenoisingColored() 等</span></p><p><span style="text-wrap: nowrap;"><br/></span></p><p><span style="text-wrap: nowrap;">噪声是平均值为1的随机变量</span></p><p><span style="text-wrap: nowrap;">对于彩色图像 先转换到 CIELAB 颜色空间 然后对 L 和 AB 成分 分别去噪</span></p><p><span style="text-wrap: nowrap;"><br/></span></p><p><span style="text-wrap: nowrap;">OpenCV 中的图像去噪</span></p><p><span style="text-wrap: nowrap;">1. cv2.fastNlMeansDenoising() 使用对象为灰度图。</span></p><p><span style="text-wrap: nowrap;">2. cv2.fastNlMeansDenoisingColored() 使用对象为彩色图。</span></p><p><span style="text-wrap: nowrap;">3. cv2.fastNlMeansDenoisingMulti() 用于短时 的图像序列 灰度图像</span></p><p><span style="text-wrap: nowrap;">4. cv2.fastNlMeansDenoisingColoredMulti() 用于短时 的图 像序列 彩色图像</span></p><p style="text-wrap: wrap;"><br/></p><p style="text-wrap: wrap;">测试原图:</p><p style="text-wrap: wrap;"><img src="/upload/image/6383667894247001158803678.png" title="die.png" alt="die.png"/></p><p style="text-wrap: wrap;"><br/></p><p style="text-wrap: wrap;"><span style="font-size: 16px; font-style: italic; font-weight: bold; line-height: 18px;">demo1:fastNlMeansDenoisingColored</span><br/></p><p style="text-wrap: wrap;"><img src="/upload/image/6383667890976361055500351.jpeg" title="Figure_1.jpeg" alt="Figure_1.jpeg"/></p><p style="text-wrap: wrap;"><span style="font-size: 16px; font-style: italic; font-weight: bold; line-height: 18px;">demo2:fastNlMeansDenoisingMulti</span><br/></p><p style="text-wrap: wrap;"><img src="/upload/image/6383667904221645758518130.jpeg" title="Figure_1.jpeg" alt="Figure_1.jpeg"/></p><p style="text-wrap: wrap;"><br/></p><p style="text-wrap: wrap;"><strong style="font-family: "Helvetica Neue", Helvetica, "PingFang SC", "Hiragino Sans GB", "Microsoft YaHei", "Noto Sans CJK SC", "WenQuanYi Micro Hei", Arial, sans-serif; margin: 0px; padding: 0px; list-style: none; border: 0px; color: rgb(51, 51, 51); "><span style="font-style: italic; color: rgb(51, 153, 204); line-height: 18px;">C#版本代码如下:</span></strong></p><p>灰度图像处理“FastNlMeansDenoisingMulti”方法在C#中存在内存异常,不能用,彩图API“FastNlMeansDenoisingColoredMulti”可以使用。</p><p>参考来源:<a href="https://github.com/shimat/opencvsharp/blob/main/test/OpenCvSharp.Tests/photo/PhotoTest.cs" target="_blank">https://github.com/shimat/opencvsharp/blob/main/test/OpenCvSharp.Tests/photo/PhotoTest.cs</a></p><pre class="brush:c#;toolbar:false">using OpenCvSharp;
using System.Collections.Generic;
namespace demo
{
internal class Program
{
static void Main(string[] args)
{
//demo1();
demo2();
}
/// <summary>
/// FastNlMeansDenoisingColored
/// </summary>
static void demo1()
{
Mat img = Cv2.ImRead("../../../images/die.png");
Cv2.CvtColor(img, img, ColorConversionCodes.BGR2RGB);
Mat dst = new Mat();
Cv2.FastNlMeansDenoisingColored(img, dst, 10, 10, 7, 21);
Cv2.ImShow("img", img);
Cv2.ImShow("dst", dst);
Cv2.WaitKey(0);
}
/// <summary>
/// fastNlMeansDenoisingMulti
/// </summary>
static void demo2()
{
VideoCapture cap = new VideoCapture("../../../images/vtest.avi");
// 读取三帧图像
double pos = cap.Get(VideoCaptureProperties.FrameCount);
List<Mat> srcImgs = new List<Mat>();
Mat frame = new Mat();
for (int i = 0; i < 5; i++)
{
cap.Set(VideoCaptureProperties.PosFrames, (int)(pos / 6 * i));
cap.Read(frame);
//Cv2.CvtColor(frame, frame, ColorConversionCodes.BGR2GRAY);
srcImgs.Add(frame);
}
// 一共5帧图像,我们取第二帧
Mat dst = new Mat();
// FastNlMeansDenoisingMulti存在内存异常,这个版本的OpenCv不能用....
//Cv2.FastNlMeansDenoisingMulti(srcImgs, dst,
// imgToDenoiseIndex: 2,
// temporalWindowSize: 5,
// h: 4,
// templateWindowSize: 7,
// searchWindowSize: 35);
// 这个可以用,但是运行有点慢
Cv2.FastNlMeansDenoisingColoredMulti(srcImgs, dst,
imgToDenoiseIndex: 2,
temporalWindowSize: 5,
h: 4,
templateWindowSize: 7,
searchWindowSize: 35);
Cv2.ImShow("srcImgs", srcImgs[2]);
Cv2.ImShow("dst", dst);
Cv2.WaitKey(0);
}
}
}</pre><p style="text-wrap: wrap;"><br/></p><p style="text-wrap: wrap;"><strong style="font-family: "Helvetica Neue", Helvetica, "PingFang SC", "Hiragino Sans GB", "Microsoft YaHei", "Noto Sans CJK SC", "WenQuanYi Micro Hei", Arial, sans-serif; margin: 0px; padding: 0px; list-style: none; border: 0px; color: rgb(51, 51, 51); "><strong style="margin: 0px; padding: 0px; list-style: none; border: 0px;"><span style="font-style: italic; color: rgb(51, 153, 204); line-height: 18px;">C++版本代码如下:</span></strong></strong></p><pre class="brush:cpp;toolbar:false">#include <opencv2/opencv.hpp>
#include <opencv2/core/utils/logger.hpp>
#include <string>
#include <iostream>
using namespace cv;
using namespace std;
// FastNlMeansDenoisingColored
void demo1()
{
Mat img = cv::imread("../images/die.png");
cv::cvtColor(img, img, COLOR_BGR2RGB);
Mat dst;
cv::fastNlMeansDenoisingColored(img, dst, 10, 10, 7, 21);
cv::imshow("img", img);
cv::imshow("dst", dst);
cv::waitKey(0);
}
// fastNlMeansDenoisingMulti
void demo2()
{
VideoCapture cap = VideoCapture("../images/vtest.avi");
// 读取三帧图像
double pos = cap.get(VideoCaptureProperties::CAP_PROP_FRAME_COUNT);
vector<Mat> srcImgs;
Mat frame;
for (int i = 0; i < 5; i++)
{
cap.set(VideoCaptureProperties::CAP_PROP_POS_FRAMES, (int)(pos / 6 * i));
cap >> frame;
cv::cvtColor(frame, frame, COLOR_BGR2GRAY);
srcImgs.push_back(frame);
}
// 一共5帧图像,我们取第二帧
Mat dst;
cv::fastNlMeansDenoisingMulti(srcImgs, dst, 2, 5, 4, 7, 35);
cv::imshow("srcImgs", srcImgs[2]);
cv::imshow("dst", dst);
cv::waitKey(0);
}
int main()
{
// 关闭opencv日志
cv::utils::logging::setLogLevel(cv::utils::logging::LOG_LEVEL_SILENT);
//demo1();
demo2();
}</pre><p style="text-wrap: wrap;"><br/></p><p style="text-wrap: wrap;"><strong style="font-family: "Helvetica Neue", Helvetica, "PingFang SC", "Hiragino Sans GB", "Microsoft YaHei", "Noto Sans CJK SC", "WenQuanYi Micro Hei", Arial, sans-serif; margin: 0px; padding: 0px; list-style: none; border: 0px; color: rgb(51, 51, 51); "><strong style="margin: 0px; padding: 0px; list-style: none; border: 0px;"><span style="font-style: italic; color: rgb(51, 153, 204); line-height: 18px;">Python版本代码如下:</span></strong></strong></p><p>fastNlMeansDenoisingColored</p><pre class="brush:python;toolbar:false">import cv2
from matplotlib import pyplot as plt
img = cv2.imread('../images/die.png')
img = cv2.cvtColor(img, code=cv2.COLOR_BGR2RGB)
dst = cv2.fastNlMeansDenoisingColored(img, None, 10, 10, 7, 21)
# dst2=cv2.cvtColor(dst,code=cv2.COLOR_BGR2RGB)
plt.subplot(121), plt.imshow(img)
plt.subplot(122), plt.imshow(dst)
# plt.subplot(122), plt.imshow(dst2)
plt.show()</pre><p><br/></p><p>fastNlMeansDenoisingMulti</p><pre class="brush:python;toolbar:false">import numpy as np
import cv2
from matplotlib import pyplot as plt
cap = cv2.VideoCapture('../images/vtest.avi')
# create a list of first 5 frames
img = [cap.read()[1] for i in range(5)]
# convert all to grayscale
gray = [cv2.cvtColor(i, cv2.COLOR_BGR2GRAY) for i in img]
# convert all to float64
gray = [np.float64(i) for i in gray]
# create a noise of variance 25
noise = np.random.randn(*gray[1].shape) * 10
# Add this noise to images
noisy = [i + noise for i in gray]
# Convert back to uint8
noisy = [np.uint8(np.clip(i, 0, 255)) for i in noisy]
# Denoise 3rd frame considering all the 5 frames
dst = cv2.fastNlMeansDenoisingMulti(noisy, 2, 5, None, 4, 7, 35)
plt.subplot(131), plt.imshow(gray[2], 'gray')
plt.subplot(132), plt.imshow(noisy[2], 'gray')
plt.subplot(133), plt.imshow(dst, 'gray')
plt.show()</pre><p><br/></p>
计算摄影学-图像去噪 下面这段代码是 OpenCV-Python-Tutorial-中文版.pdf (P288) 中的实现
当前系列所有demo下载地址:
https://github.com/GaoRenBao/OpenCv4-Demo
https://gitee.com/fuckgrb/OpenCv4-Demo
不同编程语言对应的OpenCv版本以及开发环境 信息如下:
语言
OpenCv 版本
IDE
C#
OpenCvSharp4.4.8.0.20230708
Visual Studio 2022
C++
O pen C v-4.5.5-vc14_vc15
Visual Studio 2022
Python
OpenCv-Python (4.6.0.66)
PyCharm Community Edition 2022.1.3
目标
• 学习使用非局部平均值去噪算法去除图像中的噪声
• 学习函数 cv2.fastNlMeansDenoising() cv2.fastNlMeansDenoisingColored() 等
噪声是平均值为1的随机变量
对于彩色图像 先转换到 CIELAB 颜色空间 然后对 L 和 AB 成分 分别去噪
OpenCV 中的图像去噪
1. cv2.fastNlMeansDenoising() 使用对象为灰度图。
2. cv2.fastNlMeansDenoisingColored() 使用对象为彩色图。
3. cv2.fastNlMeansDenoisingMulti() 用于短时 的图像序列 灰度图像
4. cv2.fastNlMeansDenoisingColoredMulti() 用于短时 的图 像序列 彩色图像
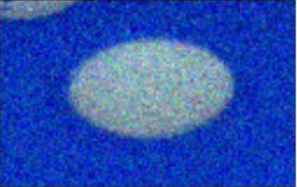
测试原图:
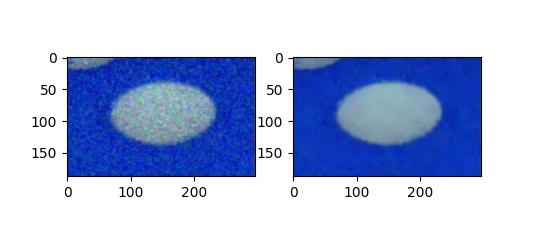
demo1:fastNlMeansDenoisingColored
demo2:fastNlMeansDenoisingMulti
C#版本代码如下:
灰度图像处理“FastNlMeansDenoisingMulti”方法在C#中存在内存异常,不能用,彩图API“FastNlMeansDenoisingColoredMulti”可以使用。
参考来源:https://github.com/shimat/opencvsharp/blob/main/test/OpenCvSharp.Tests/photo/PhotoTest.cs
using OpenCvSharp;
using System.Collections.Generic;

namespace demo
{
    internal class Program
    {
        static void Main(string[] args)
        {
            //demo1();
            demo2();
        }

        /// <summary>
        /// FastNlMeansDenoisingColored
        /// </summary>
        static void demo1()
        {
            Mat img = Cv2.ImRead("../../../images/die.png");
            Cv2.CvtColor(img, img, ColorConversionCodes.BGR2RGB);

            Mat dst = new Mat();
            Cv2.FastNlMeansDenoisingColored(img, dst, 10, 10, 7, 21);

            Cv2.ImShow("img", img);
            Cv2.ImShow("dst", dst);
            Cv2.WaitKey(0);
        }

        /// <summary>
        /// fastNlMeansDenoisingMulti
        /// </summary>
        static void demo2()
        {
            VideoCapture cap = new VideoCapture("../../../images/vtest.avi");

            // 读取三帧图像
            double pos = cap.Get(VideoCaptureProperties.FrameCount);

            List<Mat> srcImgs = new List<Mat>();
            Mat frame = new Mat();
            for (int i = 0; i < 5; i++)
            {
                cap.Set(VideoCaptureProperties.PosFrames, (int)(pos / 6 * i));
                cap.Read(frame);
                //Cv2.CvtColor(frame, frame, ColorConversionCodes.BGR2GRAY);
                srcImgs.Add(frame);
            }

            // 一共5帧图像,我们取第二帧
            Mat dst = new Mat();

            // FastNlMeansDenoisingMulti存在内存异常,这个版本的OpenCv不能用....

            //Cv2.FastNlMeansDenoisingMulti(srcImgs, dst,
            //    imgToDenoiseIndex: 2,
            //    temporalWindowSize: 5,
            //    h: 4,
            //    templateWindowSize: 7,
            //    searchWindowSize: 35);

            // 这个可以用,但是运行有点慢
            Cv2.FastNlMeansDenoisingColoredMulti(srcImgs, dst,
               imgToDenoiseIndex: 2,
               temporalWindowSize: 5,
               h: 4,
               templateWindowSize: 7,
               searchWindowSize: 35);

            Cv2.ImShow("srcImgs", srcImgs[2]);
            Cv2.ImShow("dst", dst);
            Cv2.WaitKey(0);
        }
    }
}
C++版本代码如下:
#include <opencv2/opencv.hpp>
#include <opencv2/core/utils/logger.hpp>

#include <string>
#include <iostream>

using namespace cv;
using namespace std;

// FastNlMeansDenoisingColored
void demo1()
{
    Mat img = cv::imread("../images/die.png");
    cv::cvtColor(img, img, COLOR_BGR2RGB);

    Mat dst;
    cv::fastNlMeansDenoisingColored(img, dst, 10, 10, 7, 21);

    cv::imshow("img", img);
    cv::imshow("dst", dst);
    cv::waitKey(0);
}

// fastNlMeansDenoisingMulti
void demo2()
{
    VideoCapture cap = VideoCapture("../images/vtest.avi");

    // 读取三帧图像
    double pos = cap.get(VideoCaptureProperties::CAP_PROP_FRAME_COUNT);

    vector<Mat> srcImgs;
    Mat frame;
    for (int i = 0; i < 5; i++)
    {
        cap.set(VideoCaptureProperties::CAP_PROP_POS_FRAMES, (int)(pos / 6 * i));
        cap >> frame;
        cv::cvtColor(frame, frame, COLOR_BGR2GRAY);
        srcImgs.push_back(frame);
    }

    // 一共5帧图像,我们取第二帧
    Mat dst;
    cv::fastNlMeansDenoisingMulti(srcImgs, dst, 2, 5, 4, 7, 35);

    cv::imshow("srcImgs", srcImgs[2]);
    cv::imshow("dst", dst);
    cv::waitKey(0);
}

int main()
{
    // 关闭opencv日志
    cv::utils::logging::setLogLevel(cv::utils::logging::LOG_LEVEL_SILENT);

    //demo1();
    demo2();
}
Python版本代码如下:
fastNlMeansDenoisingColored
import cv2
from matplotlib import pyplot as plt

img = cv2.imread('../images/die.png')
img = cv2.cvtColor(img, code=cv2.COLOR_BGR2RGB)

dst = cv2.fastNlMeansDenoisingColored(img, None, 10, 10, 7, 21)
# dst2=cv2.cvtColor(dst,code=cv2.COLOR_BGR2RGB)

plt.subplot(121), plt.imshow(img)
plt.subplot(122), plt.imshow(dst)
# plt.subplot(122), plt.imshow(dst2)
plt.show()
fastNlMeansDenoisingMulti
import numpy as np
import cv2
from matplotlib import pyplot as plt

cap = cv2.VideoCapture('../images/vtest.avi')
# create a list of first 5 frames
img = [cap.read()[1] for i in range(5)]
# convert all to grayscale
gray = [cv2.cvtColor(i, cv2.COLOR_BGR2GRAY) for i in img]
# convert all to float64
gray = [np.float64(i) for i in gray]


# create a noise of variance 25
noise = np.random.randn(*gray[1].shape) * 10
# Add this noise to images
noisy = [i + noise for i in gray]
# Convert back to uint8
noisy = [np.uint8(np.clip(i, 0, 255)) for i in noisy]

# Denoise 3rd frame considering all the 5 frames
dst = cv2.fastNlMeansDenoisingMulti(noisy, 2, 5, None, 4, 7, 35)


plt.subplot(131), plt.imshow(gray[2], 'gray')
plt.subplot(132), plt.imshow(noisy[2], 'gray')
plt.subplot(133), plt.imshow(dst, 'gray')
plt.show()


