warpPerspective透视变换
视频讲解如下:
在本章节中给大家演示如何进行warpPerspective透视变换,主要函数:warpPerspective。
当前代码并非毛星云的代码,而是博主自行整理的,毛星云的教程中好像没有透视变换这一讲。
当前系列所有demo下载地址:
https://github.com/GaoRenBao/OpenCv4-Demo
不同编程语言对应的OpenCv版本以及开发环境信息如下:
语言 | OpenCv版本 | IDE |
C# | OpenCvSharp4.4.8.0.20230708 | Visual Studio 2022 |
C++ | OpenCv-4.5.5-vc14_vc15 | Visual Studio 2022 |
Python | OpenCv-Python (4.6.0.66) | PyCharm Community Edition 2022.1.3 |
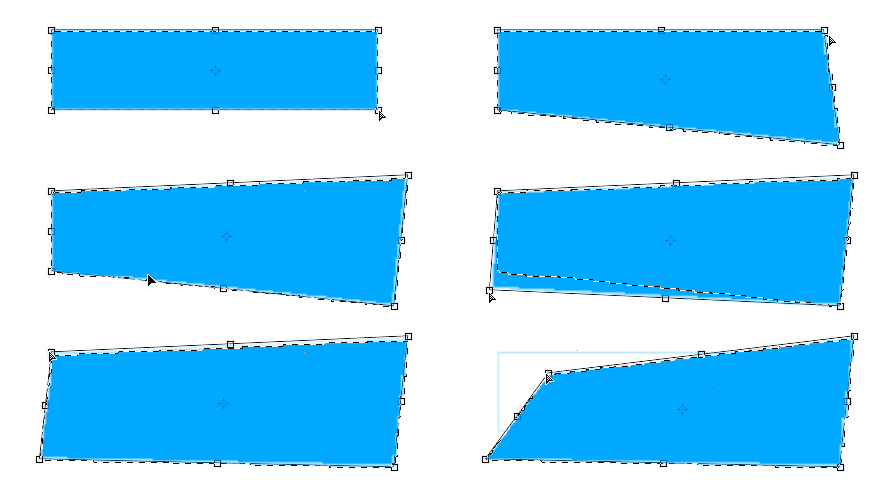
透视变换,其实可以理解成Photoshop里面的“扭曲”操作。
PS里面的扭曲操作如下:

在PS里面,可以进行扭曲操作的点有8个,而opencv的透视变换操作的点只有4个,即:4个角点。

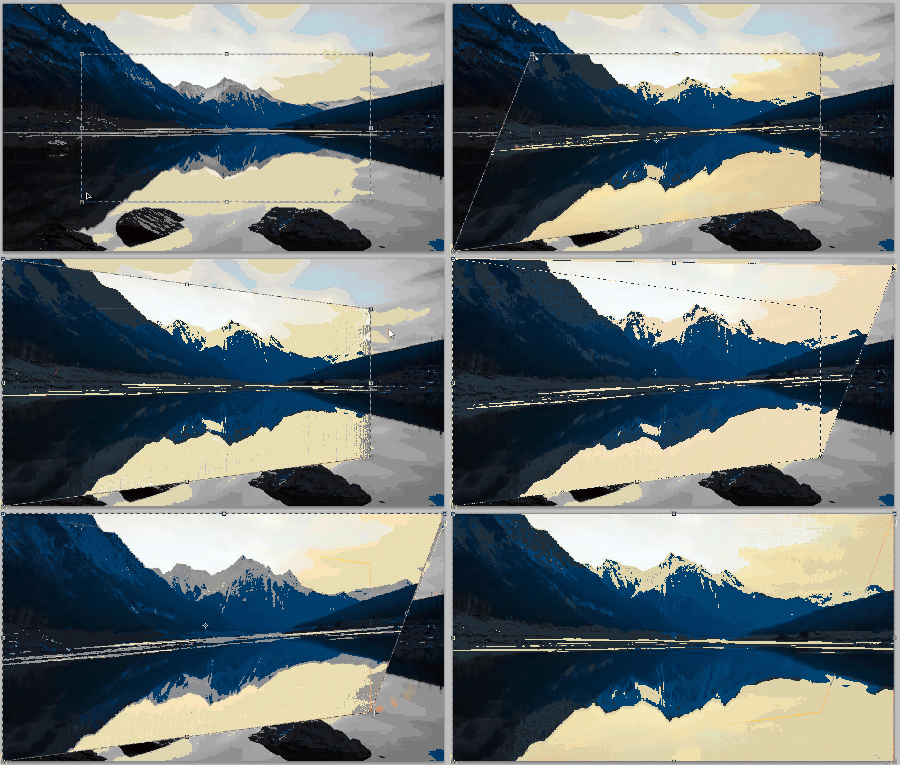
在演示之前,我们需要先准备一张测试用的图片,我们最终的目的,是实现PS中扭曲的操作,将图像中心部分放大,并铺满画布。

运行效果如下(C#):
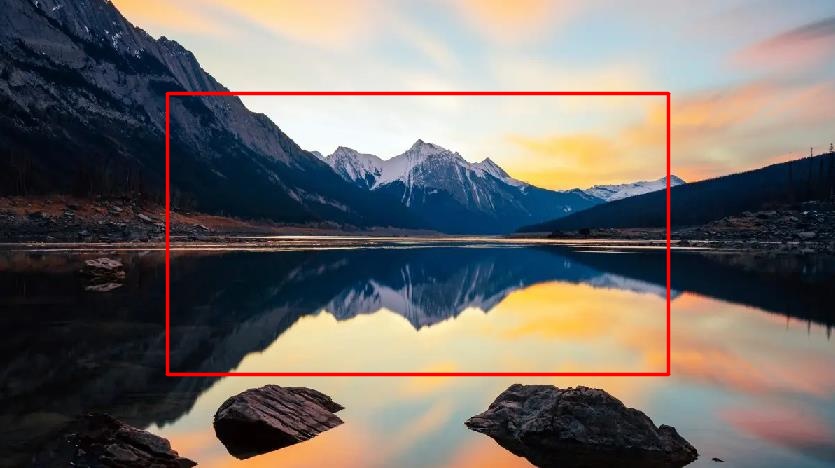
透视区域:

执行结果:

C#版本代码如下:
using OpenCvSharp;
using System.Collections.Generic;

namespace demo
{
    internal class Program
    {
        static void Main(string[] args)
        {
            Mat srcImage = Cv2.ImRead("../../../images/Astral3.jpg");

            // 起始坐标
            List<Point2f> org = new List<Point2f>();
            org.Add(new Point2f((float)(srcImage.Width * 0.2), (float)(srcImage.Height * 0.2)));
            org.Add(new Point2f((float)(srcImage.Width * 0.8), (float)(srcImage.Height * 0.2)));
            org.Add(new Point2f((float)(srcImage.Width * 0.8), (float)(srcImage.Height * 0.8)));
            org.Add(new Point2f((float)(srcImage.Width * 0.2), (float)(srcImage.Height * 0.8)));

            // 目标坐标
            List<Point2f> dst = new List<Point2f>();
            dst.Add(new Point2f(0, 0));
            dst.Add(new Point2f(srcImage.Width, 0));
            dst.Add(new Point2f(srcImage.Width, srcImage.Height));
            dst.Add(new Point2f(0, srcImage.Height));

            Cv2.Line(srcImage, new Point(org[0].X, org[0].Y), new Point(org[1].X, org[1].Y), new Scalar(0, 0, 255), 2, LineTypes.AntiAlias);
            Cv2.Line(srcImage, new Point(org[1].X, org[1].Y), new Point(org[2].X, org[2].Y), new Scalar(0, 0, 255), 2, LineTypes.AntiAlias);
            Cv2.Line(srcImage, new Point(org[2].X, org[2].Y), new Point(org[3].X, org[3].Y), new Scalar(0, 0, 255), 2, LineTypes.AntiAlias);
            Cv2.Line(srcImage, new Point(org[3].X, org[3].Y), new Point(org[0].X, org[0].Y), new Scalar(0, 0, 255), 2, LineTypes.AntiAlias);
            Cv2.ImShow("透视线", srcImage);

            Mat warpR = Cv2.GetPerspectiveTransform(org, dst);
            Cv2.WarpPerspective(srcImage, srcImage, warpR, srcImage.Size());
            Cv2.ImShow("识别结果", srcImage);
            Cv2.WaitKey();
        }
    }
}
C++版本代码如下:
#include <opencv2/opencv.hpp>
#include <opencv2/imgproc/imgproc.hpp>
#include <opencv2/highgui/highgui.hpp>
#include <iostream>

using namespace cv;
using namespace std;

int main()
{
    Mat srcImage = imread("../images/Astral3.jpg");

    // 起始坐标
    vector<Point2f> org;
    org.push_back(Point2f((float)(srcImage.cols * 0.2), (float)(srcImage.rows * 0.2)));
    org.push_back(Point2f((float)(srcImage.cols * 0.8), (float)(srcImage.rows * 0.2)));
    org.push_back(Point2f((float)(srcImage.cols * 0.8), (float)(srcImage.rows * 0.8)));
    org.push_back(Point2f((float)(srcImage.cols * 0.2), (float)(srcImage.rows * 0.8)));

    // 目标坐标
    vector<Point2f> dst;
    dst.push_back(Point2f(0, 0));
    dst.push_back(Point2f(srcImage.cols, 0));
    dst.push_back(Point2f(srcImage.cols, srcImage.rows));
    dst.push_back(Point2f(0, srcImage.rows));

    line(srcImage, Point(org[0].x, org[0].y), Point(org[1].x, org[1].y), Scalar(0, 0, 255), 2, LINE_AA);
    line(srcImage, Point(org[1].x, org[1].y), Point(org[2].x, org[2].y), Scalar(0, 0, 255), 2, LINE_AA);
    line(srcImage, Point(org[2].x, org[2].y), Point(org[3].x, org[3].y), Scalar(0, 0, 255), 2, LINE_AA);
    line(srcImage, Point(org[3].x, org[3].y), Point(org[0].x, org[0].y), Scalar(0, 0, 255), 2, LINE_AA);
    imshow("透视线", srcImage);

    Mat warpR = getPerspectiveTransform(org, dst);
    warpPerspective(srcImage, srcImage, warpR, srcImage.size());
    imshow("识别结果", srcImage);

	waitKey(0);
	return 0;
}
Python版本代码如下:
import cv2
import numpy as np

img = cv2.imread('../images/Astral3.jpg')
h, w = img.shape[0:2]

# 起始坐标
org = np.array([[w * 0.2, h * 0.2],
                [w * 0.8, h * 0.2],
                [w * 0.8, h * 0.8],
                [w * 0.2, h * 0.8]], np.float32)
# 目标坐标
dst = np.array([[0, 0],
                [w, 0],
                [w, h],
                [0, h]], np.float32)

cv2.line(img,(int(org[0][0]),int(org[0][1])),(int(org[1][0]),int(org[1][1])),(0, 0, 255),4)
cv2.line(img,(int(org[1][0]),int(org[1][1])),(int(org[2][0]),int(org[2][1])),(0, 0, 255),4)
cv2.line(img,(int(org[2][0]),int(org[2][1])),(int(org[3][0]),int(org[3][1])),(0, 0, 255),4)
cv2.line(img,(int(org[3][0]),int(org[3][1])),(int(org[0][0]),int(org[0][1])),(0, 0, 255),4)
cv2.imshow("img", img)

warpR = cv2.getPerspectiveTransform(org, dst)
result = cv2.warpPerspective(img, warpR, (w, h))
cv2.imshow("result", result)
cv2.waitKey(0)
cv2.destroyAllWindows()


