<h1 style="font-size: 32px; font-weight: bold; border-bottom: 2px solid rgb(204, 204, 204); padding: 0px 4px 0px 0px; text-align: left; margin: 0px 0px 10px;">直方图反向投影</h1><p>视频讲解如下:</p><p><embed src="//player.bilibili.com/player.html?aid=639297984&bvid=BV1JY4y167yf&cid=727348940&page=1&high_quality=1&danmaku=0" width="817" height="460" wmode="transparent" play="true" loop="false" menu="false" allowscriptaccess="never" allowfullscreen="true"/></p><p><br/></p><p style="white-space: normal;">在本章节中给大家演示反向投影,当前代码同样是在毛星云的代码基础上进行扩展优化的。</p><p style="margin-top: 0px; margin-bottom: 10px; white-space: normal; padding: 0px; list-style: none; border: 0px; overflow-wrap: break-word; word-break: break-all; line-height: 1.5em; font-family: "Helvetica Neue", Helvetica, "PingFang SC", "Hiragino Sans GB", "Microsoft YaHei", "Noto Sans CJK SC", "WenQuanYi Micro Hei", Arial, sans-serif; color: rgb(51, 51, 51); box-sizing: border-box;">当前系列所有demo下载地址:</p><p style="margin-top: 0px; margin-bottom: 10px; white-space: normal; padding: 0px; list-style: none; border: 0px; overflow-wrap: break-word; word-break: break-all; line-height: 1.5em; font-family: "Helvetica Neue", Helvetica, "PingFang SC", "Hiragino Sans GB", "Microsoft YaHei", "Noto Sans CJK SC", "WenQuanYi Micro Hei", Arial, sans-serif; color: rgb(51, 51, 51); box-sizing: border-box;"><a href="https://github.com/GaoRenBao/OpenCv4-Demo" target="_blank" style="margin: 0px; padding: 0px; list-style: none; border: 0px; color: rgb(0, 102, 0); transition-duration: 0.2s; transition-property: opacity; outline: none; opacity: 0.8;">https://github.com/GaoRenBao/OpenCv4-Demo</a></p><p style="margin-top: 0px; margin-bottom: 10px; text-wrap: wrap; padding: 0px; list-style: none; border: 0px; overflow-wrap: break-word; word-break: break-all; line-height: 1.5em; font-family: "Helvetica Neue", Helvetica, "PingFang SC", "Hiragino Sans GB", "Microsoft YaHei", "Noto Sans CJK SC", "WenQuanYi Micro Hei", Arial, sans-serif; box-sizing: border-box; color: rgb(51, 51, 51);">不同编程语言对应的OpenCv版本以及<span style="">开发环境</span>信息如下:<span style="font-family: Calibri; font-size: 14px;"> </span></p><table border="1" style="border-right: none; border-bottom: none; border-image: initial; border-left: 1px solid rgb(102, 102, 102); border-top: 1px solid rgb(102, 102, 102);"><tbody><tr class="firstRow"><td width="81" valign="top" style="border-color: windowtext rgb(102, 102, 102) rgb(102, 102, 102) windowtext; border-bottom-width: 1px; border-bottom-style: solid; border-right-width: 1px; border-right-style: solid; padding: 5px;"><p style="text-align: center;"><strong><span style="font-family: 宋体; font-size: 14px;">语言</span></strong></p></td><td width="223" valign="top" style="border-color: windowtext rgb(102, 102, 102) rgb(102, 102, 102) windowtext; border-bottom-width: 1px; border-bottom-style: solid; border-right-width: 1px; border-right-style: solid; padding: 5px;"><p style="text-align: center;"><strong><span style="font-family: 宋体; font-size: 14px;"><span style="font-family: Calibri;">OpenCv</span>版本</span></strong></p></td><td width="242" valign="top" style="border-color: windowtext rgb(102, 102, 102) rgb(102, 102, 102) windowtext; border-bottom-width: 1px; border-bottom-style: solid; border-right-width: 1px; border-right-style: solid; padding: 5px;"><p style="text-align: center;"><strong><span style="font-family: 宋体; font-size: 14px;"><span style="font-family: Calibri;">IDE</span></span></strong></p></td></tr><tr><td width="81" valign="top" style="border-top: none; border-left-color: windowtext; border-bottom: 1px solid rgb(102, 102, 102); border-right: 1px solid rgb(102, 102, 102); padding: 5px;"><p><span style="font-family: 宋体; font-size: 14px;"><span style="font-family: Calibri;">C#</span></span></p></td><td width="223" valign="top" style="border-top: none; border-left-color: windowtext; border-bottom: 1px solid rgb(102, 102, 102); border-right: 1px solid rgb(102, 102, 102); padding: 5px;"><p><span style="font-family: Calibri; letter-spacing: 0px;">OpenCvSharp4.4.8.0.20230708</span></p></td><td width="242" valign="top" style="border-top: none; border-left-color: windowtext; border-bottom: 1px solid rgb(102, 102, 102); border-right: 1px solid rgb(102, 102, 102); padding: 5px;"><p><span style="font-family: 宋体; font-size: 14px;"><span style="font-family: Calibri;">Visual Studio 2022</span></span></p></td></tr><tr><td width="81" valign="top" style="border-top: none; border-left-color: windowtext; border-bottom: 1px solid rgb(102, 102, 102); border-right: 1px solid rgb(102, 102, 102); padding: 5px;"><p><span style="font-family: 宋体; font-size: 14px;"><span style="font-family: Calibri;">C++</span></span></p></td><td width="223" valign="top" style="border-top: none; border-left-color: windowtext; border-bottom: 1px solid rgb(102, 102, 102); border-right: 1px solid rgb(102, 102, 102); padding: 5px;"><p><span style="font-family: 宋体; letter-spacing: 0px;"><span style="font-family: Calibri;">O</span></span><span style="font-family: Calibri; letter-spacing: 0px;">pen</span><span style="font-family: 宋体; letter-spacing: 0px;"><span style="font-family: Calibri;">C</span></span><span style="font-family: Calibri; letter-spacing: 0px;">v-4.5.5-vc14_vc15</span></p></td><td width="242" valign="top" style="border-top: none; border-left-color: windowtext; border-bottom: 1px solid rgb(102, 102, 102); border-right: 1px solid rgb(102, 102, 102); padding: 5px;"><p><span style="font-family: 宋体; font-size: 14px;"><span style="font-family: Calibri;">Visual Studio 2022</span></span></p></td></tr><tr><td width="81" valign="top" style="border-top: none; border-left-color: windowtext; border-bottom: 1px solid rgb(102, 102, 102); border-right: 1px solid rgb(102, 102, 102); padding: 5px;"><p><span style="font-family: 宋体; font-size: 14px;"><span style="font-family: Calibri;">Python</span></span></p></td><td width="223" valign="top" style="border-top: none; border-left-color: windowtext; border-bottom: 1px solid rgb(102, 102, 102); border-right: 1px solid rgb(102, 102, 102); padding: 5px;"><p><span style="font-family: 宋体; font-size: 14px;"><span style="font-family: Calibri;">OpenCv-Python (4.6.0.66)</span></span></p></td><td width="242" valign="top" style="border-top: none; border-left-color: windowtext; border-bottom: 1px solid rgb(102, 102, 102); border-right: 1px solid rgb(102, 102, 102); padding: 5px;"><p><span style="font-family: 宋体; font-size: 14px;"><span style="font-family: Calibri;">PyCharm Community Edition 2022.1.3</span></span></p></td></tr></tbody></table><p><br/></p><p style="white-space: normal;">首先呢,我们需要准备一张测试图片。(不想下载工程的童鞋,可直接复制下面的图片和代码)</p><p><img src="/upload/image/6378882584601138041238055.jpg" title="1.jpg" alt="1.jpg" width="798" height="600"/></p><p><br/></p><p>三个版本的运行效果其实都是一样的,我这里就单独拿C#版本的来做演示,运行效果如下:</p><p><br/></p><p><img src="/upload/image/6378882857298907455849756.gif" title="1.gif" alt="1.gif" width="1201" height="679"/></p><p><br/></p><p><strong style="margin: 0px; padding: 0px; list-style: none; border: 0px; color: rgb(51, 51, 51); font-family: "Helvetica Neue", Helvetica, "PingFang SC", "Hiragino Sans GB", "Microsoft YaHei", "Noto Sans CJK SC", "WenQuanYi Micro Hei", Arial, sans-serif; white-space: normal; "><span style="font-size: 16px; font-style: italic; font-weight: bold; color: rgb(51, 153, 204); line-height: 18px;">C#版本代码如下:</span></strong></p><p><strong style="margin: 0px; padding: 0px; list-style: none; border: 0px; color: rgb(51, 51, 51); font-family: "Helvetica Neue", Helvetica, "PingFang SC", "Hiragino Sans GB", "Microsoft YaHei", "Noto Sans CJK SC", "WenQuanYi Micro Hei", Arial, sans-serif; white-space: normal; "></strong></p><p style="white-space: normal;">C#版本需要安装“OpenCvSharp4”、“OpenCvSharp4.runtime.win”两个库才行。不然会报错。</p><p style="white-space: normal;">如果需要使用“ BitmapConverter.ToBitmap”操作,则需要追加安装“OpenCvSharp4.Extensions”库。</p><pre class="brush:c#;toolbar:false">using OpenCvSharp;
using System;
namespace demo
{
internal class Program
{
static string WINDOW_NAME1 = "【原始图】";
static Mat g_srcImage = new Mat();
static Mat g_hsvImage = new Mat();
static Mat g_hueImage = new Mat();
static int g_bins = 30;//直方图组距
static void Main(string[] args)
{
//【1】读取源图像,并转换到 HSV 空间
g_srcImage = Cv2.ImRead("../../../images/hand.jpg");
if (g_srcImage.Empty())
{
Console.WriteLine("读取图片错误,请确定目录下是否有imread函数指定图片存在~!");
return;
}
//【2】得到原图的灰度图像并进行平滑
g_hsvImage = new Mat();
Cv2.CvtColor(g_srcImage, g_hsvImage, ColorConversionCodes.BGR2HSV);
//【2】分离 Hue 色调通道
g_hueImage = Mat.Zeros(g_hsvImage.Size(), g_hsvImage.Type());
int[] ch = { 0, 0 };
Mat[] input = { g_hsvImage };
Mat[] output = { g_hueImage };
Cv2.MixChannels(input, output, ch);
//【3】创建 Trackbar 来输入bin的数目
// opencv3:WindowMode.AutoSize
// opencv4:WindowFlags.AutoSize
Cv2.NamedWindow(WINDOW_NAME1, WindowFlags.AutoSize);
Cv2.CreateTrackbar("色调组距:", WINDOW_NAME1, ref g_bins, 180, on_BinChange);
on_BinChange(0, IntPtr.Zero);
Cv2.WaitKey(0);
}
// opencv3:on_BinChange(int pos, object userData)
// opencv4:on_BinChange(int pos, IntPtr userData)
private static void on_BinChange(int pos, IntPtr userData)
{
int[] channels = { 0 };
Mat hist = new Mat();
int[] histSize = { Math.Max(g_bins, 2) };
Rangef hue_range = new Rangef(0, 180);
Rangef[] ranges = { hue_range };
//【2】计算直方图并归一化
Cv2.CalcHist(new Mat[] { g_hueImage },//输入的数组
channels, // 通道索引
null, // 不使用掩膜
hist, // 输出的目标直方图
1, // 需要计算的直方图的维度为2
histSize, // 存放每个维度的直方图尺寸的数组
ranges, // 每一维数值的取值范围数组
true, // 指示直方图是否均匀的标识符,true表示均匀的直方图
false); // 累计标识符,false表示直方图在配置阶段会被清零
Cv2.Normalize(hist, hist, 0, 255, NormTypes.MinMax, -1);
//【3】计算反向投影
Mat backproj = new Mat();
Cv2.CalcBackProject(new Mat[] { g_hueImage }, channels, hist, backproj, ranges, true);
//【4】显示反向投影
Cv2.ImShow("反向投影图", backproj);
//【5】绘制直方图的参数准备
int w = 400; int h = 400;
int bin_w = (int)Math.Round((double)w / histSize[0]);
Mat histImg = new Mat(new Size(w, h), MatType.CV_8UC3);
histImg.SetIdentity(new Scalar(0));
//【6】绘制直方图
for (int i = 0; i < g_bins; i++)
{
Rect rect = new Rect()
{
X = Math.Min(i * bin_w, (i + 1) * bin_w),
Y = (int)Math.Min(h, h - Math.Round(hist.At<float>(i) * h / 255.0)),
Height = Math.Abs((int)Math.Round(hist.At<float>(i) * h / 255.0)),
Width = bin_w
};
Cv2.Rectangle(histImg, rect, new Scalar(100, 123, 255), -1);
}
//【7】显示直方图窗口
Cv2.ImShow("直方图", histImg);
}
}
}</pre><p><strong style="margin: 0px; padding: 0px; list-style: none; border: 0px; color: rgb(51, 51, 51); font-family: "Helvetica Neue", Helvetica, "PingFang SC", "Hiragino Sans GB", "Microsoft YaHei", "Noto Sans CJK SC", "WenQuanYi Micro Hei", Arial, sans-serif; white-space: normal; "></strong><br/></p><p><strong style="margin: 0px; padding: 0px; list-style: none; border: 0px; color: rgb(51, 51, 51); font-family: "Helvetica Neue", Helvetica, "PingFang SC", "Hiragino Sans GB", "Microsoft YaHei", "Noto Sans CJK SC", "WenQuanYi Micro Hei", Arial, sans-serif; white-space: normal; "><span style="font-size: 16px; font-style: italic; font-weight: bold; color: rgb(51, 153, 204); line-height: 18px;">C++版本代码如下:</span></strong></p><pre class="brush:cpp;toolbar:false">#include "opencv2/imgproc/imgproc.hpp"
#include "opencv2/highgui/highgui.hpp"
using namespace cv;
// 为窗口标题定义的宏
#define WINDOW_NAME1 "反向投影图"
Mat g_srcImage; Mat g_hsvImage; Mat g_hueImage;
int g_bins = 30;//直方图组距
void on_BinChange(int, void*)
{
//【1】参数准备
MatND hist;
int histSize = MAX(g_bins, 2);
float hue_range[] = { 0, 180 };
const float* ranges = { hue_range };
//【2】计算直方图并归一化
calcHist(&g_hueImage, 1, 0, Mat(), hist, 1, &histSize, &ranges, true, false);
normalize(hist, hist, 0, 255, NORM_MINMAX, -1, Mat());
//【3】计算反向投影
MatND backproj;
calcBackProject(&g_hueImage, 1, 0, hist, backproj, &ranges, 1, true);
//【4】显示反向投影
imshow(WINDOW_NAME1, backproj);
//【5】绘制直方图的参数准备
int w = 400; int h = 400;
int bin_w = cvRound((double)w / histSize);
Mat histImg = Mat::zeros(w, h, CV_8UC3);
//【6】绘制直方图
for (int i = 0; i < g_bins; i++)
{
rectangle(histImg, Point(i * bin_w, h), Point((i + 1) * bin_w, h - cvRound(hist.at<float>(i) * h / 255.0)), Scalar(100, 123, 255), -1);
}
//【7】显示直方图窗口
imshow("直方图", histImg);
}
int main()
{
//【1】读取源图像,并转换到 HSV 空间
g_srcImage = imread("../images/hand.jpg", 1);
if (!g_srcImage.data) { printf("读取图片错误,请确定目录下是否有imread函数指定图片存在~! \n"); return false; }
cvtColor(g_srcImage, g_hsvImage,COLOR_BGR2HSV);
//【2】分离 Hue 色调通道
g_hueImage.create(g_hsvImage.size(), g_hsvImage.depth());
int ch[] = { 0, 0 };
mixChannels(&g_hsvImage, 1, &g_hueImage, 1, ch, 1);
//【3】创建 Trackbar 来输入bin的数目
namedWindow(WINDOW_NAME1, WINDOW_AUTOSIZE);
createTrackbar("色调组距 ", WINDOW_NAME1, &g_bins, 180, on_BinChange);
on_BinChange(0, 0);//进行一次初始化
//【4】显示效果图
imshow(WINDOW_NAME1, g_srcImage);
// 等待用户按键
waitKey(0);
return 0;
}</pre><p><strong style="margin: 0px; padding: 0px; list-style: none; border: 0px; color: rgb(51, 51, 51); font-family: "Helvetica Neue", Helvetica, "PingFang SC", "Hiragino Sans GB", "Microsoft YaHei", "Noto Sans CJK SC", "WenQuanYi Micro Hei", Arial, sans-serif; white-space: normal; "></strong><br/></p><p><strong style="margin: 0px; padding: 0px; list-style: none; border: 0px; color: rgb(51, 51, 51); font-family: "Helvetica Neue", Helvetica, "PingFang SC", "Hiragino Sans GB", "Microsoft YaHei", "Noto Sans CJK SC", "WenQuanYi Micro Hei", Arial, sans-serif; white-space: normal; "><span style="font-size: 16px; font-style: italic; font-weight: bold; color: rgb(51, 153, 204); line-height: 18px;">Python版本代码如下:</span></strong></p><pre class="brush:python;toolbar:false">import cv2
import numpy as np
def on_BinChange(x):
global g_hueImage
# 获取滑动条的值
g_bins = cv2.getTrackbarPos('g_bins', 'backproj')
# 计算直方图并归一化
histSize = [max(g_bins, 2)]
hist = cv2.calcHist([g_hueImage], [0], None, histSize, [0, 180])
cv2.normalize(hist, hist, 0, 255, cv2.NORM_MINMAX)
# 计算反向投影
backproj = cv2.calcBackProject([g_hueImage], [0], hist, [0, 180], 1)
# 显示反向投影
cv2.imshow("backproj", backproj)
# 绘制直方图的参数准备
w = 400
h = 400
bin_w = int(w / histSize[0])
histImg = np.zeros((w, h, 3), np.uint8)
# 绘制直方图
for i in range(g_bins):
cv2.rectangle(histImg, (i * bin_w, h), (int((i + 1) * bin_w), int(h - hist[i][0] * h / 255.0)),
(100, 123, 255), -1)
# 显示直方图窗口
cv2.imshow("histImg", histImg)
# 读取源图像,并转换到 HSV 空间
g_srcImage = cv2.imread("../images/hand.jpg")
g_hsvImage = cv2.cvtColor(g_srcImage, cv2.COLOR_BGR2HSV)
# 【2】分离 Hue 色调通道
g_hueImage = np.zeros((g_hsvImage.shape[0], g_hsvImage.shape[1], 3), np.uint8)
ch = [0, 0]
cv2.mixChannels([g_hsvImage], [g_hueImage], ch)
# 创建 Trackbar 来输入bin的数目
cv2.namedWindow('backproj')
cv2.createTrackbar('g_bins', 'backproj', 0, 180, on_BinChange)
cv2.setTrackbarPos('g_bins', 'backproj', 30)
# 等待用户按键
cv2.waitKey(0)
cv2.destroyAllWindows()</pre><p><br/><strong style="margin: 0px; padding: 0px; list-style: none; border: 0px; color: rgb(51, 51, 51); font-family: "Helvetica Neue", Helvetica, "PingFang SC", "Hiragino Sans GB", "Microsoft YaHei", "Noto Sans CJK SC", "WenQuanYi Micro Hei", Arial, sans-serif; white-space: normal; "></strong></p><p>在python版本中,可以利用matplotlib来显示我们的直方图数据,以下demo的详细说明,请参考pdf,pdf中并没用提供一个完整的demo,已代码为博主根据文档自行整理的。</p><p>参考来源:<a href="/api/system/download?file=OpenCV-Python-Tutorial-%E4%B8%AD%E6%96%87%E7%89%88.pdf" target="_blank">OpenCV-Python-Tutorial-中文版.pdf(P141 直方图反向投影)</a></p><p style="white-space: normal;"><a href="/upload/file/OpenCV-Python-Tutorial-%E4%B8%AD%E6%96%87%E7%89%88.pdf" target="_blank" title="在线预览"><span style="color: rgb(255, 0, 0);">在线预览</span></a></p><p style="white-space: normal;"><br/></p><p> 直方图反向投影是由MichaelJ.Swain和Dana.H.Ballard在他们的文章”Indexingviacolorhistograms”中提出。</p><p> 那它到底是什么呢?它可以用来做图像分割,或者在图像中找寻我们感兴趣的部分。简单来说,它会输出与输入图像(待搜索)同样大小的图像,其中的每一个像素值代表了输入图像上对应点属于目标对象的概率。用更简单的话来解释,输出图像中像素值越高(越白)的点就越可能代表我们要搜索的目标(在输入图像所在的位置)。这是一个直观的解释。直方图投影经常与camshift算法等一起使用。</p><p> 我们应该怎样来实现这个算法呢?首先我们要为一张包含我们要查找自标的图像创建直方图(在我们的示例中,我们要查找的是草地,其他的都不要)。我们要查找的对象要尽量占满这张图像(换句话说,这张图像上最好是有且仅有我们要查找的对象)。最好使用颜色直方图,因为一个物体的颜色要比它的灰度能更好的被用来进行图像分割与对象识别。接着我们再把这个颜色直方图投影到输入图像中寻找我们的目标,也就是找到输入图像中的每一个像素点的像素值在直方图中对应的概率,这样我们就得到一个概率图像,最后设置适当的闹值对概率图像进行二值化,就这么简单。</p><p style="white-space: normal;"><br/></p><p style="white-space: normal;">演示之前我们需要做准备一张ROI图片:</p><p style="white-space: normal;"><img src="/upload/image/6379857841359985893382147.jpg" title="home5.jpg" alt="home5.jpg"/></p><p style="white-space: normal;">执行效果如下:</p><p style="white-space: normal;"><img src="/upload/image/6379857845858557137797147.jpg" title="calcHist_out.jpg" alt="calcHist_out.jpg"/></p><pre class="brush:python;toolbar:false">import cv2
import numpy as np
from matplotlib import pyplot as plt
# Numpy 中的算法
# roi is the object or region of object we need to find
roi = cv2.imread('home5.jpg')
hsv = cv2.cvtColor(roi, cv2.COLOR_BGR2HSV)
# target is the image we search in
target = cv2.imread('home4.jpg')
hsvt = cv2.cvtColor(target, cv2.COLOR_BGR2HSV)
# Find the histograms using calcHist. Can be done with np.histogram2d also
M = cv2.calcHist([hsv], [0, 1], None, [180, 256], [0, 180, 0, 256])
I = cv2.calcHist([hsvt], [0, 1], None, [180, 256], [0, 180, 0, 256])
h, s, v = cv2.split(hsvt)
R=M/I
B = R[h.ravel(), s.ravel()]
B = np.minimum(B, 1)
B = B.reshape(hsvt.shape[:2])
disc = cv2.getStructuringElement(cv2.MORPH_ELLIPSE, (5, 5))
B = cv2.filter2D(B, -1, disc)
B = np.uint8(B)
cv2.normalize(B, B, 0, 255, cv2.NORM_MINMAX)
ret,thresh = cv2.threshold(B,50,255,0)
cv2.imwrite('calcHist_out.jpg', thresh)
cv2.waitKey(0)</pre><p><br/></p>
直方图反向投影 视频讲解如下:
在本章节中给大家演示反向投影,当前代码同样是在毛星云的代码基础上进行扩展优化的。
当前系列所有demo下载地址:
https://github.com/GaoRenBao/OpenCv4-Demo
不同编程语言对应的OpenCv版本以及开发环境 信息如下:
语言
OpenCv 版本
IDE
C#
OpenCvSharp4.4.8.0.20230708
Visual Studio 2022
C++
O pen C v-4.5.5-vc14_vc15
Visual Studio 2022
Python
OpenCv-Python (4.6.0.66)
PyCharm Community Edition 2022.1.3
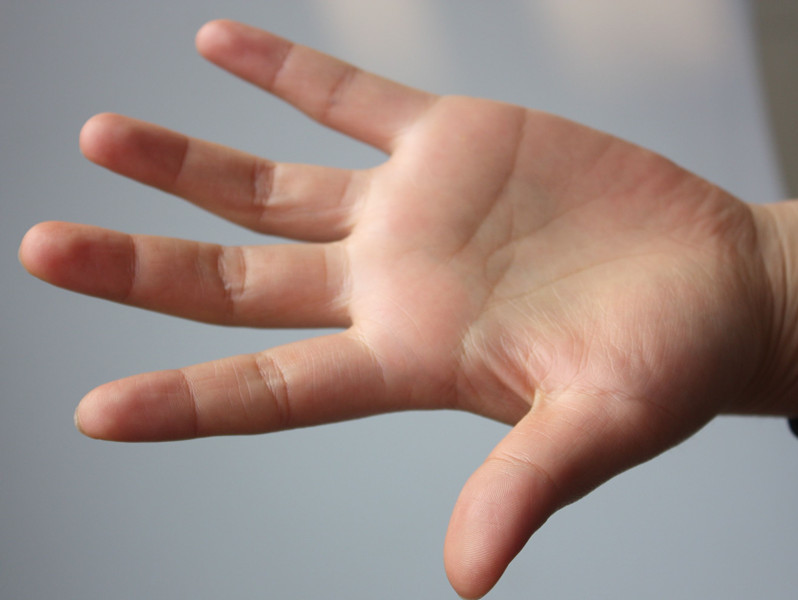
首先呢,我们需要准备一张测试图片。(不想下载工程的童鞋,可直接复制下面的图片和代码)
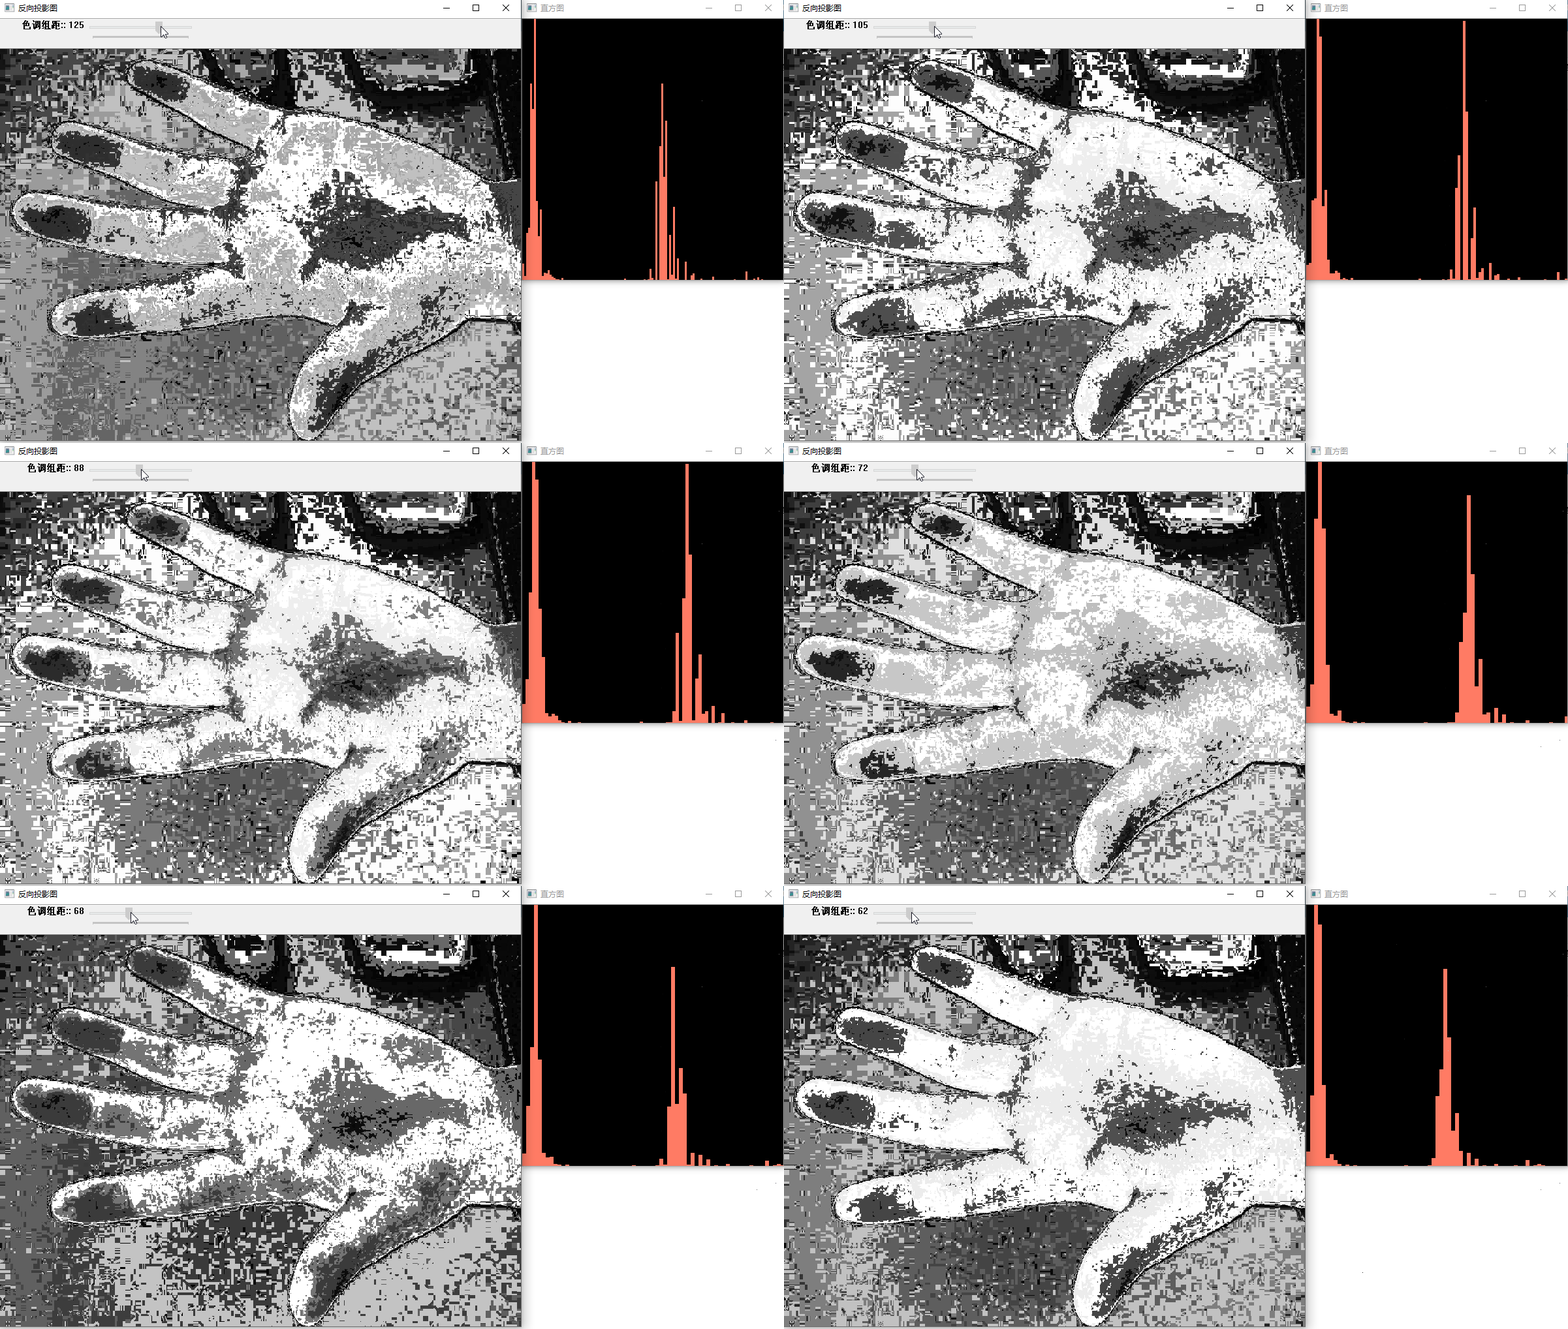
三个版本的运行效果其实都是一样的,我这里就单独拿C#版本的来做演示,运行效果如下:
C#版本代码如下:
C#版本需要安装“OpenCvSharp4”、“OpenCvSharp4.runtime.win”两个库才行。不然会报错。
如果需要使用“ BitmapConverter.ToBitmap”操作,则需要追加安装“OpenCvSharp4.Extensions”库。
using OpenCvSharp;
using System;

namespace demo
{
    internal class Program
    {
        static string WINDOW_NAME1 = "【原始图】";
        static Mat g_srcImage = new Mat();
        static Mat g_hsvImage = new Mat();
        static Mat g_hueImage = new Mat();
        static int g_bins = 30;//直方图组距

        static void Main(string[] args)
        {
            //【1】读取源图像,并转换到 HSV 空间
            g_srcImage = Cv2.ImRead("../../../images/hand.jpg");
            if (g_srcImage.Empty())
            {
                Console.WriteLine("读取图片错误,请确定目录下是否有imread函数指定图片存在~!");
                return;
            }

            //【2】得到原图的灰度图像并进行平滑
            g_hsvImage = new Mat();
            Cv2.CvtColor(g_srcImage, g_hsvImage, ColorConversionCodes.BGR2HSV);

            //【2】分离 Hue 色调通道
            g_hueImage = Mat.Zeros(g_hsvImage.Size(), g_hsvImage.Type());
            int[] ch = { 0, 0 };
            Mat[] input = { g_hsvImage };
            Mat[] output = { g_hueImage };
            Cv2.MixChannels(input, output, ch);

            //【3】创建 Trackbar 来输入bin的数目
            // opencv3:WindowMode.AutoSize
            // opencv4:WindowFlags.AutoSize
            Cv2.NamedWindow(WINDOW_NAME1, WindowFlags.AutoSize);
            Cv2.CreateTrackbar("色调组距:", WINDOW_NAME1, ref g_bins, 180, on_BinChange);
            on_BinChange(0, IntPtr.Zero);
            Cv2.WaitKey(0);
        }

        // opencv3:on_BinChange(int pos, object userData)
        // opencv4:on_BinChange(int pos, IntPtr userData)
        private static void on_BinChange(int pos, IntPtr userData)
        {
            int[] channels = { 0 };
            Mat hist = new Mat();
            int[] histSize = { Math.Max(g_bins, 2) };
            Rangef hue_range = new Rangef(0, 180);
            Rangef[] ranges = { hue_range };

            //【2】计算直方图并归一化
            Cv2.CalcHist(new Mat[] { g_hueImage },//输入的数组
                channels, // 通道索引
                null,     // 不使用掩膜
                hist,  // 输出的目标直方图
                1,        // 需要计算的直方图的维度为2
                histSize,     // 存放每个维度的直方图尺寸的数组
                ranges,   // 每一维数值的取值范围数组
                true,     // 指示直方图是否均匀的标识符,true表示均匀的直方图
                false);   // 累计标识符,false表示直方图在配置阶段会被清零

            Cv2.Normalize(hist, hist, 0, 255, NormTypes.MinMax, -1);

            //【3】计算反向投影
            Mat backproj = new Mat();
            Cv2.CalcBackProject(new Mat[] { g_hueImage }, channels, hist, backproj, ranges, true);

            //【4】显示反向投影
            Cv2.ImShow("反向投影图", backproj);

            //【5】绘制直方图的参数准备
            int w = 400; int h = 400;
            int bin_w = (int)Math.Round((double)w / histSize[0]);

            Mat histImg = new Mat(new Size(w, h), MatType.CV_8UC3);
            histImg.SetIdentity(new Scalar(0));

            //【6】绘制直方图
            for (int i = 0; i < g_bins; i++)
            {
                Rect rect = new Rect()
                {
                    X = Math.Min(i * bin_w, (i + 1) * bin_w),
                    Y = (int)Math.Min(h, h - Math.Round(hist.At<float>(i) * h / 255.0)),
                    Height = Math.Abs((int)Math.Round(hist.At<float>(i) * h / 255.0)),
                    Width = bin_w
                };
                Cv2.Rectangle(histImg, rect, new Scalar(100, 123, 255), -1);
            }

            //【7】显示直方图窗口
            Cv2.ImShow("直方图", histImg);
        }
    }
}
C++版本代码如下:
#include "opencv2/imgproc/imgproc.hpp"
#include "opencv2/highgui/highgui.hpp"
using namespace cv;

// 为窗口标题定义的宏
#define WINDOW_NAME1 "反向投影图"

Mat g_srcImage; Mat g_hsvImage; Mat g_hueImage;
int g_bins = 30;//直方图组距

void on_BinChange(int, void*)
{
	//【1】参数准备
	MatND hist;
	int histSize = MAX(g_bins, 2);
	float hue_range[] = { 0, 180 };
	const float* ranges = { hue_range };

	//【2】计算直方图并归一化
	calcHist(&g_hueImage, 1, 0, Mat(), hist, 1, &histSize, &ranges, true, false);
	normalize(hist, hist, 0, 255, NORM_MINMAX, -1, Mat());

	//【3】计算反向投影
	MatND backproj;
	calcBackProject(&g_hueImage, 1, 0, hist, backproj, &ranges, 1, true);

	//【4】显示反向投影
	imshow(WINDOW_NAME1, backproj);

	//【5】绘制直方图的参数准备
	int w = 400; int h = 400;
	int bin_w = cvRound((double)w / histSize);
	Mat histImg = Mat::zeros(w, h, CV_8UC3);

	//【6】绘制直方图
	for (int i = 0; i < g_bins; i++)
	{
		rectangle(histImg, Point(i * bin_w, h), Point((i + 1) * bin_w, h - cvRound(hist.at<float>(i) * h / 255.0)), Scalar(100, 123, 255), -1);
	}

	//【7】显示直方图窗口
	imshow("直方图", histImg);
}

int main()
{
	//【1】读取源图像,并转换到 HSV 空间
	g_srcImage = imread("../images/hand.jpg", 1);
	if (!g_srcImage.data) { printf("读取图片错误,请确定目录下是否有imread函数指定图片存在~! \n"); return false; }

	cvtColor(g_srcImage, g_hsvImage,COLOR_BGR2HSV);

	//【2】分离 Hue 色调通道
	g_hueImage.create(g_hsvImage.size(), g_hsvImage.depth());
	int ch[] = { 0, 0 };
	mixChannels(&g_hsvImage, 1, &g_hueImage, 1, ch, 1);

	//【3】创建 Trackbar 来输入bin的数目
	namedWindow(WINDOW_NAME1, WINDOW_AUTOSIZE);
	createTrackbar("色调组距 ", WINDOW_NAME1, &g_bins, 180, on_BinChange);
	on_BinChange(0, 0);//进行一次初始化

	//【4】显示效果图
	imshow(WINDOW_NAME1, g_srcImage);

	// 等待用户按键
	waitKey(0);
	return 0;
}
Python版本代码如下:
import cv2
import numpy as np


def on_BinChange(x):
    global g_hueImage

    # 获取滑动条的值
    g_bins = cv2.getTrackbarPos('g_bins', 'backproj')

    # 计算直方图并归一化
    histSize = [max(g_bins, 2)]
    hist = cv2.calcHist([g_hueImage], [0], None, histSize, [0, 180])
    cv2.normalize(hist, hist, 0, 255, cv2.NORM_MINMAX)

    # 计算反向投影
    backproj = cv2.calcBackProject([g_hueImage], [0], hist, [0, 180], 1)

    # 显示反向投影
    cv2.imshow("backproj", backproj)

    # 绘制直方图的参数准备
    w = 400
    h = 400
    bin_w = int(w / histSize[0])
    histImg = np.zeros((w, h, 3), np.uint8)

    # 绘制直方图
    for i in range(g_bins):
        cv2.rectangle(histImg, (i * bin_w, h), (int((i + 1) * bin_w), int(h - hist[i][0] * h / 255.0)),
                      (100, 123, 255), -1)

    # 显示直方图窗口
    cv2.imshow("histImg", histImg)


# 读取源图像,并转换到 HSV 空间
g_srcImage = cv2.imread("../images/hand.jpg")
g_hsvImage = cv2.cvtColor(g_srcImage, cv2.COLOR_BGR2HSV)

# 【2】分离 Hue 色调通道
g_hueImage = np.zeros((g_hsvImage.shape[0], g_hsvImage.shape[1], 3), np.uint8)
ch = [0, 0]
cv2.mixChannels([g_hsvImage], [g_hueImage], ch)

# 创建 Trackbar 来输入bin的数目
cv2.namedWindow('backproj')
cv2.createTrackbar('g_bins', 'backproj', 0, 180, on_BinChange)
cv2.setTrackbarPos('g_bins', 'backproj', 30)

# 等待用户按键
cv2.waitKey(0)
cv2.destroyAllWindows()
在python版本中,可以利用matplotlib来显示我们的直方图数据,以下demo的详细说明,请参考pdf,pdf中并没用提供一个完整的demo,已代码为博主根据文档自行整理的。
参考来源:OpenCV-Python-Tutorial-中文版.pdf(P141 直方图反向投影)
在线预览
直方图反向投影是由MichaelJ.Swain和Dana.H.Ballard在他们的文章”Indexingviacolorhistograms”中提出。
那它到底是什么呢?它可以用来做图像分割,或者在图像中找寻我们感兴趣的部分。简单来说,它会输出与输入图像(待搜索)同样大小的图像,其中的每一个像素值代表了输入图像上对应点属于目标对象的概率。用更简单的话来解释,输出图像中像素值越高(越白)的点就越可能代表我们要搜索的目标(在输入图像所在的位置)。这是一个直观的解释。直方图投影经常与camshift算法等一起使用。
我们应该怎样来实现这个算法呢?首先我们要为一张包含我们要查找自标的图像创建直方图(在我们的示例中,我们要查找的是草地,其他的都不要)。我们要查找的对象要尽量占满这张图像(换句话说,这张图像上最好是有且仅有我们要查找的对象)。最好使用颜色直方图,因为一个物体的颜色要比它的灰度能更好的被用来进行图像分割与对象识别。接着我们再把这个颜色直方图投影到输入图像中寻找我们的目标,也就是找到输入图像中的每一个像素点的像素值在直方图中对应的概率,这样我们就得到一个概率图像,最后设置适当的闹值对概率图像进行二值化,就这么简单。
演示之前我们需要做准备一张ROI图片:
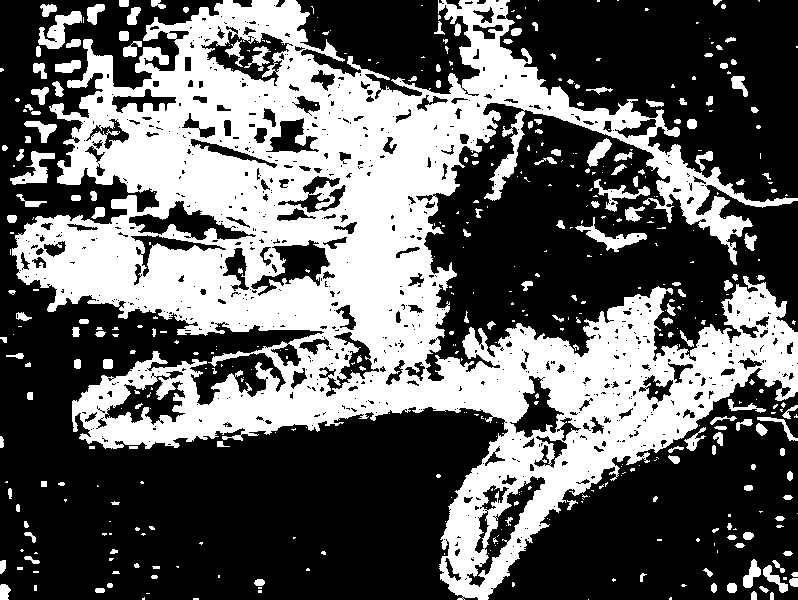
执行效果如下:
import cv2
import numpy as np
from matplotlib import pyplot as plt

# Numpy 中的算法

# roi is the object or region of object we need to find
roi = cv2.imread('home5.jpg')
hsv = cv2.cvtColor(roi, cv2.COLOR_BGR2HSV)
# target is the image we search in
target = cv2.imread('home4.jpg')

hsvt = cv2.cvtColor(target, cv2.COLOR_BGR2HSV)
# Find the histograms using calcHist. Can be done with np.histogram2d also
M = cv2.calcHist([hsv], [0, 1], None, [180, 256], [0, 180, 0, 256])
I = cv2.calcHist([hsvt], [0, 1], None, [180, 256], [0, 180, 0, 256])

h, s, v = cv2.split(hsvt)
R=M/I
B = R[h.ravel(), s.ravel()]
B = np.minimum(B, 1)
B = B.reshape(hsvt.shape[:2])

disc = cv2.getStructuringElement(cv2.MORPH_ELLIPSE, (5, 5))
B = cv2.filter2D(B, -1, disc)
B = np.uint8(B)
cv2.normalize(B, B, 0, 255, cv2.NORM_MINMAX)

ret,thresh = cv2.threshold(B,50,255,0)
cv2.imwrite('calcHist_out.jpg', thresh)
cv2.waitKey(0)


