stitching 全景拼接
本章节内容是博主网上收集的。当前系列所有demo下载地址:
https://github.com/GaoRenBao/OpenCv4-Demo
不同编程语言对应的OpenCv版本以及开发环境信息如下:
语言 | OpenCv版本 | IDE |
C# | OpenCvSharp4.4.8.0.20230708 | Visual Studio 2022 |
C++ | OpenCv-4.5.5-vc14_vc15 | Visual Studio 2022 |
Python | OpenCv-Python (4.6.0.66) | PyCharm Community Edition 2022.1.3 |
参考博客《OpenCV-Python 图像全景拼接stitch及黑边处理》
运行前,需要准备三张图片:
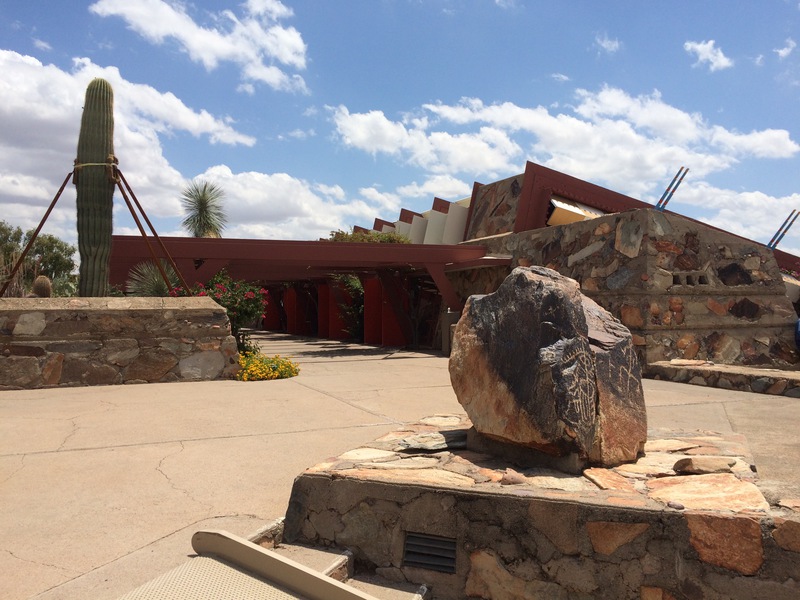
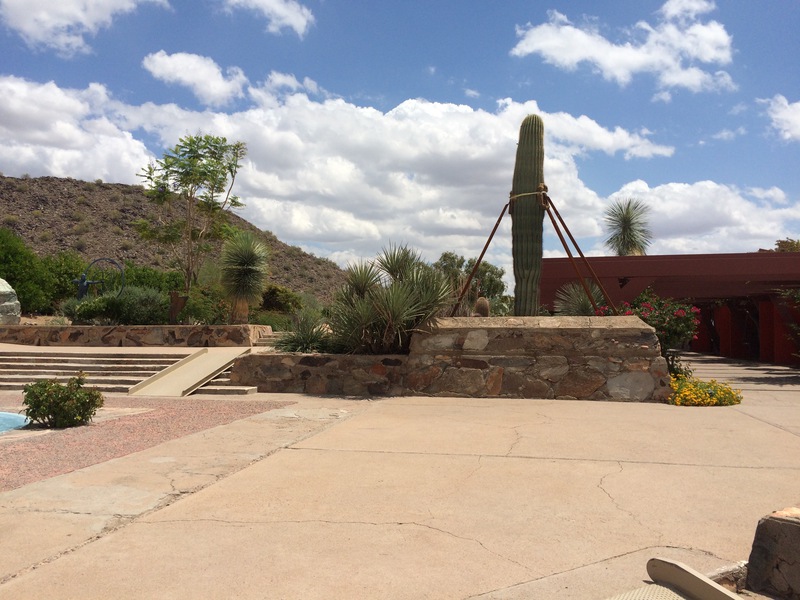
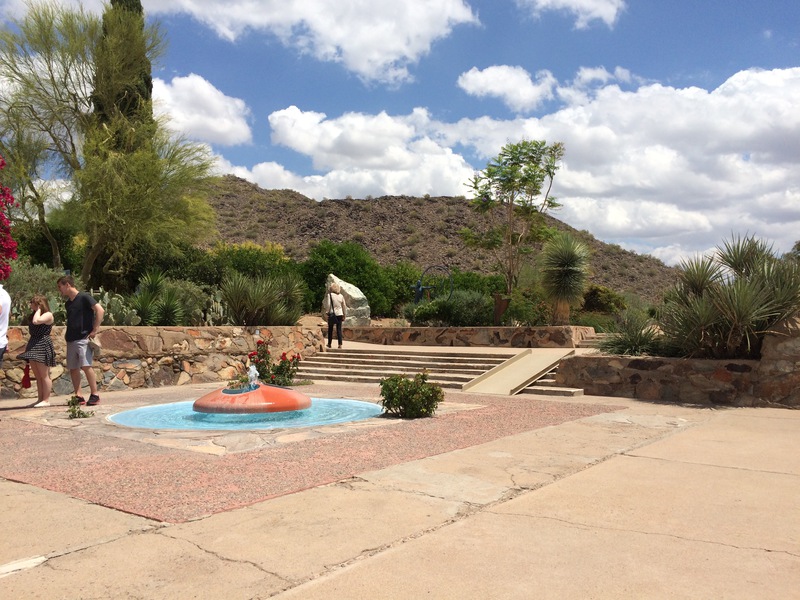
没去掉黑边的拼接效果如下:
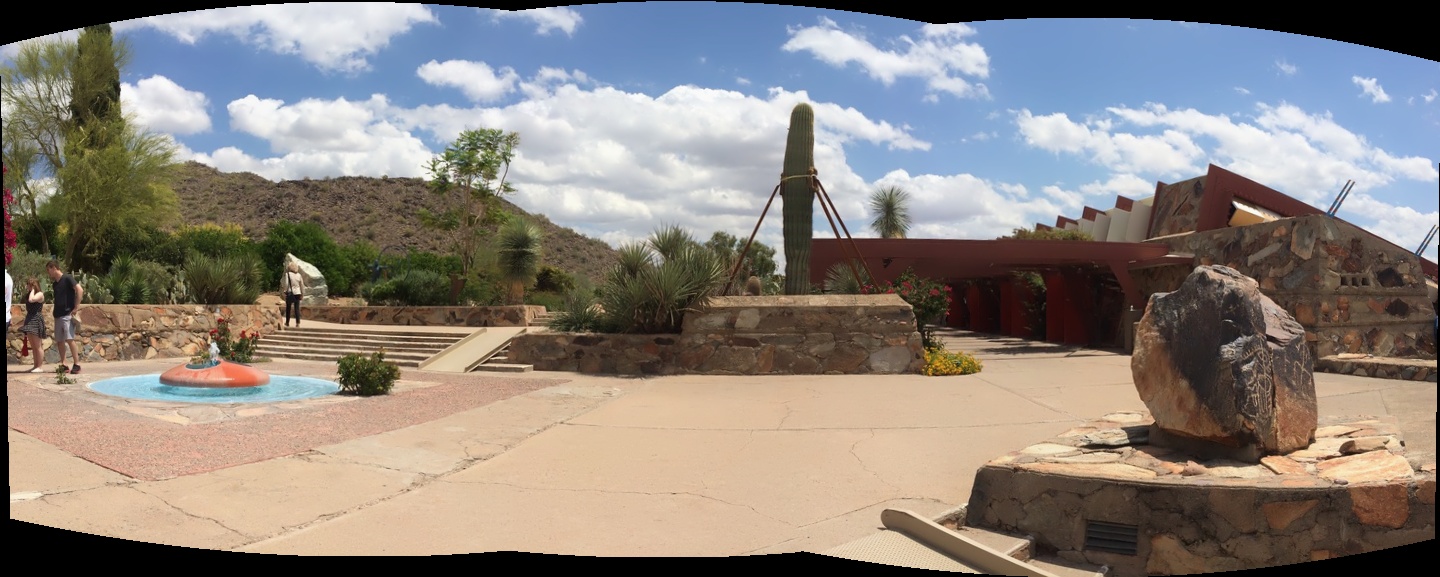
去掉黑边的拼接效果如下:
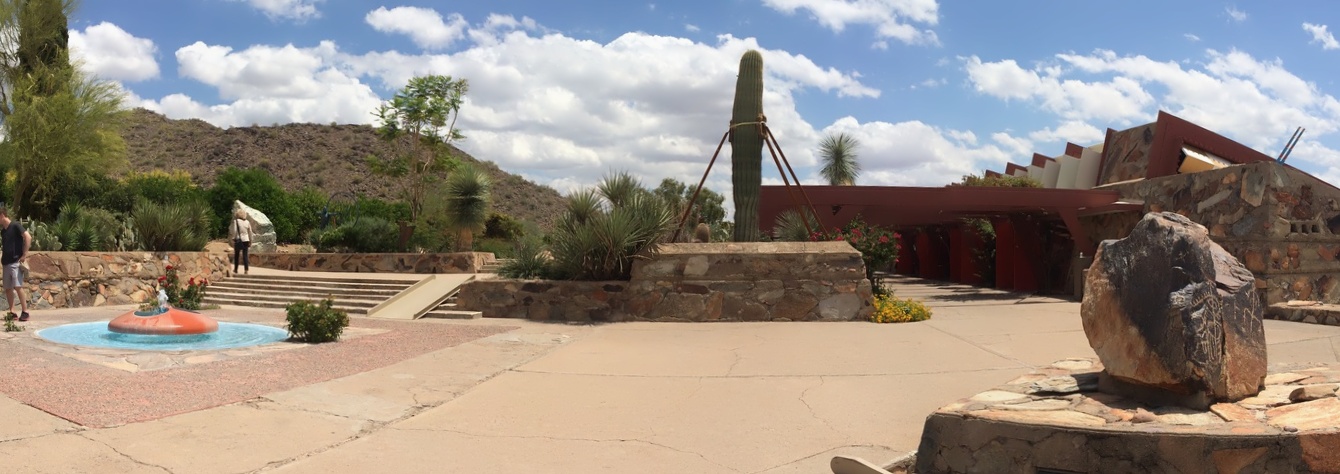
C#版本代码如下:
using OpenCvSharp;
using System.Collections.Generic;
using System;

namespace demo
{
    internal class Program
    {
        static void Main(string[] args)
        {
            //stitch1();
            stitch2();
            Cv2.WaitKey(0);
        }

        /// <summary>
        /// 全景拼接,去掉黑边
        /// </summary>
        private static void stitch1()
        {
            List<Mat> imgs = new List<Mat>();
            Mat img1 = Cv2.ImRead("../../../images/stitching1.jpg");
            Mat img2 = Cv2.ImRead("../../../images/stitching2.jpg");
            Mat img3 = Cv2.ImRead("../../../images/stitching3.jpg");
            imgs.Add(img1);
            imgs.Add(img2);
            imgs.Add(img3);
            Mat pano = new Mat();
            Stitcher stitcher = Stitcher.Create();
            Stitcher.Status status = stitcher.Stitch(imgs, pano);
            if (status != Stitcher.Status.OK)
            {
                Console.WriteLine($"Can't stitch images, error code = {status}");
                Console.Read();
                return;
            }

            // 全景图轮廓提取
            Mat stitched = new Mat();
            Mat gray = new Mat();
            Mat thresh = new Mat();
            Cv2.CopyMakeBorder(pano, stitched, 10, 10, 10, 10, BorderTypes.Constant, new Scalar(0, 0, 0));
            Cv2.CvtColor(stitched, gray, ColorConversionCodes.BGR2GRAY);
            Cv2.Threshold(gray, thresh, 0, 255, ThresholdTypes.Binary);

            //定义轮廓和层次结构
            Point[][] cnts = new Point[][] { };
            HierarchyIndex[] hierarchy;
            Cv2.FindContours(thresh, out cnts, out hierarchy, RetrievalModes.External, ContourApproximationModes.ApproxSimple, null);

            // 创建单通道黑色图像, 轮廓最小正矩形
            Mat mask = new Mat(thresh.Size(), MatType.CV_8U, new Scalar(0, 0, 0));

            // 取出list中的轮廓二值图
            Rect boundRect = Cv2.BoundingRect(cnts[0]);

            //绘制矩形
            Cv2.Rectangle(mask, boundRect.TopLeft, boundRect.BottomRight, new Scalar(255, 255, 255), -1);

            // 腐蚀处理,直到minRect的像素值都为0
            Mat minRect = new Mat();
            Mat sub = new Mat();

            mask.CopyTo(minRect);
            mask.CopyTo(sub);
            while (Cv2.CountNonZero(sub) > 0)
            {
                // 行腐蚀操作
                Mat element = Cv2.GetStructuringElement(MorphShapes.Rect, new Size(5, 5));
                Cv2.Erode(minRect, minRect, element);
                Cv2.Subtract(minRect, thresh, sub);
            }

            // 提取minRect轮廓并裁剪
            Cv2.FindContours(minRect, out cnts, out hierarchy, RetrievalModes.External, ContourApproximationModes.ApproxSimple, new Point(0, 0));
            boundRect = Cv2.BoundingRect(cnts[0]);
            stitched = new Mat(stitched, boundRect);

            Cv2.ImShow("result1", stitched);
        }

        /// <summary>
        /// 全景拼接,没去黑边
        /// </summary>
        private static void stitch2()
        {
            List<Mat> imgs = new List<Mat>();
            Mat img1 = Cv2.ImRead("../../../images/stitching1.jpg");
            Mat img2 = Cv2.ImRead("../../../images/stitching2.jpg");
            Mat img3 = Cv2.ImRead("../../../images/stitching3.jpg");
            imgs.Add(img1);
            imgs.Add(img2);
            imgs.Add(img3);
            Mat pano = new Mat();
            Stitcher stitcher = Stitcher.Create();
            Stitcher.Status status = stitcher.Stitch(imgs, pano);
            if (status != Stitcher.Status.OK)
            {
                Console.WriteLine($"Can't stitch images, error code = {status}");
                Console.Read();
                return;
            }
            Cv2.ImShow("result2", pano);
        }
    }
}
C++版本代码如下:
#include <iostream>
#include <fstream>
#include <opencv2/core/core.hpp>
#include "opencv2/highgui/highgui.hpp"
#include "opencv2/stitching.hpp"
#include<Windows.h>

using namespace std;
using namespace cv;

/// <summary>
/// 全景拼接,去掉黑边
/// </summary>
void stitch1()
{
    vector<Mat> imgs;
    Mat img1 = imread("../images/stitching1.jpg");
    Mat img2 = imread("../images/stitching2.jpg");
    Mat img3 = imread("../images/stitching3.jpg");
    imgs.push_back(img1);
    imgs.push_back(img2);
    imgs.push_back(img3);
    Mat pano;
    Ptr<Stitcher> stitcher = Stitcher::create();
    Stitcher::Status status = stitcher->stitch(imgs, pano);
    if (status != Stitcher::OK)
    {
        cout << "Can't stitch images, error code = " << status << endl;
        return;
    }

    // 全景图轮廓提取
    Mat stitched, gray, thresh;
    copyMakeBorder(pano, stitched, 10, 10, 10, 10, BORDER_CONSTANT, (0, 0, 0));
    cvtColor(stitched, gray, COLOR_BGR2GRAY);

    threshold(gray, thresh, 0, 255, THRESH_BINARY);

    //定义轮廓和层次结构
    vector<vector<Point>> cnts;
    vector<Vec4i> hierarchy;
    findContours(thresh, cnts, hierarchy, RETR_EXTERNAL, CHAIN_APPROX_SIMPLE);

    // 创建单通道黑色图像, 轮廓最小正矩形
    Mat mask(thresh.rows, thresh.cols, CV_8U);
    mask = Scalar::all(0);

    // 取出list中的轮廓二值图
    Rect boundRect = boundingRect(Mat(cnts[0]));

    //绘制矩形
    rectangle(mask, boundRect.tl(), boundRect.br(), Scalar(255, 255, 255), -1, 8, 0);

    // 腐蚀处理,直到minRect的像素值都为0
    Mat minRect, sub;
    mask.copyTo(minRect);
    mask.copyTo(sub);
    while (countNonZero(sub) > 0) {
        // 行腐蚀操作
        Mat element = getStructuringElement(MORPH_RECT, Size(5, 5));
        erode(minRect, minRect, element);
        subtract(minRect, thresh, sub);
    }

    // 提取minRect轮廓并裁剪
    findContours(minRect, cnts, hierarchy, RETR_EXTERNAL, CHAIN_APPROX_SIMPLE, Point(0, 0));
    boundRect = boundingRect(cnts[0]);
    // 裁剪
    stitched = stitched(boundRect);
    imshow("result1", stitched);
    imwrite("result1.jpg", stitched);
}

/// <summary>
/// 全景拼接,没去黑边
/// </summary>
void stitch2()
{
    vector<Mat> imgs;
    Mat img1 = imread("../images/stitching1.jpg");
    Mat img2 = imread("../images/stitching2.jpg");
    Mat img3 = imread("../images/stitching3.jpg");
    imgs.push_back(img1);
    imgs.push_back(img2);
    imgs.push_back(img3);
    Mat pano;
    Ptr<Stitcher> stitcher = Stitcher::create();
    Stitcher::Status status = stitcher->stitch(imgs, pano);
    if (status != Stitcher::OK)
    {
        cout << "Can't stitch images, error code = " << status << endl;
        return;
    }
    imshow("result2", pano);
    imwrite("result2.jpg", pano);
}

int main()
{
    stitch1();
    stitch2();
    waitKey();
    destroyAllWindows();
    return 0;
}
Python版本代码如下:
import cv2
import numpy as np


# 全景拼接,去掉黑边
def stitch1(image):
    # 图像拼接
    # stitcher = cv2.createStitcher(False)  # OpenCV 3.X.X.X使用该方法
    stitcher = cv2.Stitcher_create(cv2.Stitcher_PANORAMA)  # OpenCV 4.X.X.X使用该方法,cv2.Stitcher_create()也可以
    status, pano = stitcher.stitch(image)

    # 黑边处理
    if status == cv2.Stitcher_OK:
        # 全景图轮廓提取
        stitched = cv2.copyMakeBorder(pano, 10, 10, 10, 10, cv2.BORDER_CONSTANT, (0, 0, 0))
        gray = cv2.cvtColor(stitched, cv2.COLOR_BGR2GRAY)
        thresh = cv2.threshold(gray, 0, 255, cv2.THRESH_BINARY)[1]
        cnts = cv2.findContours(thresh, cv2.RETR_EXTERNAL, cv2.CHAIN_APPROX_SIMPLE)[0]

        # 轮廓最小正矩形
        mask = np.zeros(thresh.shape, dtype="uint8")
        (x, y, w, h) = cv2.boundingRect(cnts[0])  # 取出list中的轮廓二值图,类型为numpy.ndarray
        cv2.rectangle(mask, (x, y), (x + w, y + h), 255, -1)

        # 腐蚀处理,直到minRect的像素值都为0
        minRect = mask.copy()
        sub = mask.copy()
        while cv2.countNonZero(sub) > 0:
            minRect = cv2.erode(minRect, None)
            sub = cv2.subtract(minRect, thresh)

        # 提取minRect轮廓并裁剪
        cnts = cv2.findContours(minRect, cv2.RETR_EXTERNAL, cv2.CHAIN_APPROX_SIMPLE)[0]
        (x, y, w, h) = cv2.boundingRect(cnts[0])
        stitched = stitched[y:y + h, x:x + w]

        cv2.imshow('stitched1', stitched)
    else:
        print('图像匹配的特征点不足')


# 全景拼接,没去黑边
def stitch2(image):
    # 图像拼接
    # stitcher = cv2.createStitcher(False)  # OpenCV 3.X.X.X使用该方法
    stitcher = cv2.Stitcher_create(cv2.Stitcher_PANORAMA)  # OpenCV 4.X.X.X使用该方法,cv2.Stitcher_create()也可以
    status, pano = stitcher.stitch(image)

    if status == cv2.Stitcher_OK:
        cv2.imshow('stitched2', pano)
    else:
        print('图像匹配的特征点不足')


if __name__ == "__main__":
    image1 = cv2.imread('ng1.jpg')
    image2 = cv2.imread('ng2.jpg')
    image3 = cv2.imread('ng3.jpg')
    image = image1, image2, image3
    stitch1(image)
    # stitch2(image)
    cv2.waitKey(0)
    cv2.destroyAllWindows()


