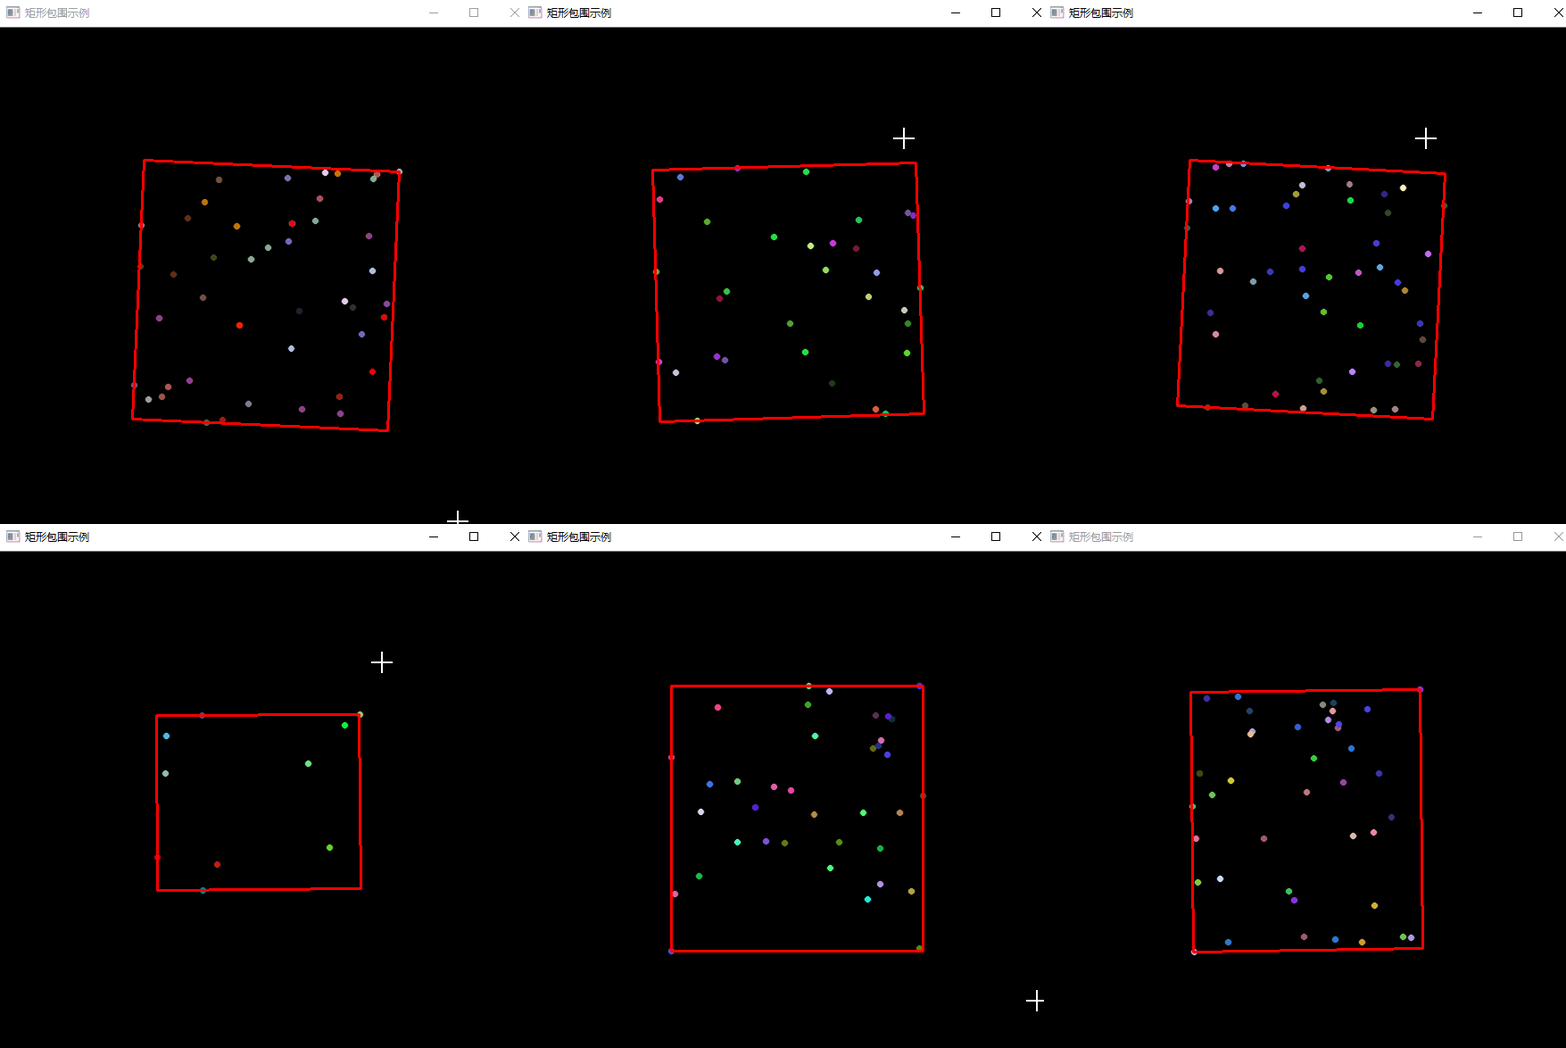
创建包围轮廓的矩形边界
视频讲解如下:
本章节给大家演示在opencv下如何进行轮廓的最小矩形检测,当前代码同样的是在毛星云的代码基础上进行扩展优化的。
C#、C++、Python三种版本的效果其实是一样的,我这里就拿C#的版本来做个演示。
当前系列所有demo下载地址:
https://github.com/GaoRenBao/OpenCv4-Demo
不同编程语言对应的OpenCv版本以及开发环境信息如下:
语言 | OpenCv版本 | IDE |
C# | OpenCvSharp4.4.8.0.20230708 | Visual Studio 2022 |
C++ | OpenCv-4.5.5-vc14_vc15 | Visual Studio 2022 |
Python | OpenCv-Python (4.6.0.66) | PyCharm Community Edition 2022.1.3 |
演示效果如下:

C#版本代码如下:
C#版本需要安装“OpenCvSharp4”、“OpenCvSharp4.runtime.win”两个库才行。不然会报错。
如果需要使用“ BitmapConverter.ToBitmap”操作,则需要追加安装“OpenCvSharp4.Extensions”库。
using OpenCvSharp;
using System.Collections.Generic;

namespace demo
{
    internal class Program
    {
        static void Main(string[] args)
        {
            RNG rng = new RNG(12345);
            Mat image = Mat.Zeros(600, 600, MatType.CV_8UC3);

            while (true)
            {
                List<Point> points = new List<Point>(); //点值

                //参数初始化
                int count = rng.Uniform(10, 50);//随机生成点的数量
                points.Clear();

                //随机生成点坐标
                for (int i = 0; i < count; i++)
                {
                    Point point;
                    point.X = rng.Uniform(image.Cols / 4, image.Cols * 3 / 4);
                    point.Y = rng.Uniform(image.Rows / 4, image.Rows * 3 / 4);
                    points.Add(point);
                }

                // 绘制出随机颜色的点
                image = Mat.Zeros(600, 600, MatType.CV_8UC3);
                for (int i = 0; i < count; i++)
                    Cv2.Circle(image, points[i], 3, new Scalar(rng.Uniform(0, 255), rng.Uniform(0, 255), rng.Uniform(0, 255)), -1, LineTypes.AntiAlias);

                // 绘制出最小面积的包围矩形
                RotatedRect box = Cv2.MinAreaRect(points);
                Point2f[] line = box.Points();
                Cv2.Line(image, (Point)line[0], (Point)line[1], new Scalar(0, 0, 255), 2, LineTypes.Link8);
                Cv2.Line(image, (Point)line[1], (Point)line[2], new Scalar(0, 0, 255), 2, LineTypes.Link8);
                Cv2.Line(image, (Point)line[2], (Point)line[3], new Scalar(0, 0, 255), 2, LineTypes.Link8);
                Cv2.Line(image, (Point)line[3], (Point)line[0], new Scalar(0, 0, 255), 2, LineTypes.Link8);

                //显示效果图
                Cv2.ImShow("矩形包围示例", image);
                Cv2.WaitKey(0);
            }
        }
    }
}
C++版本代码如下:
#include "opencv2/highgui/highgui.hpp"
#include "opencv2/imgproc/imgproc.hpp"
using namespace cv;
using namespace std;

int main()
{
	//改变console字体颜色
	system("color 1F");

	//初始化变量和随机值
	Mat image(600, 600, CV_8UC3);
	RNG& rng = theRNG();

	//循环,按下ESC,Q,q键程序退出,否则有键按下便一直更新
	while (1)
	{
		//参数初始化
		int count = rng.uniform(3, 103);//随机生成点的数量
		vector<Point> points;//点值

		//随机生成点坐标
		for (int i = 0; i < count; i++)
		{
			Point point;
			point.x = rng.uniform(image.cols / 4, image.cols * 3 / 4);
			point.y = rng.uniform(image.rows / 4, image.rows * 3 / 4);
			points.push_back(point);
		}

		//对给定的 2D 点集,寻找最小面积的包围矩形
		RotatedRect box = minAreaRect(Mat(points));
		Point2f vertex[4];
		box.points(vertex);

		//绘制出随机颜色的点
		image = Scalar::all(0);
		for (int i = 0; i < count; i++)
			circle(image, points[i], 3, Scalar(rng.uniform(0, 255), rng.uniform(0, 255), rng.uniform(0, 255)), FILLED, LINE_AA);

		//绘制出最小面积的包围矩形
		for (int i = 0; i < 4; i++)
			line(image, vertex[i], vertex[(i + 1) % 4], Scalar(100, 200, 211), 2, LINE_AA);

		//显示窗口
		imshow("矩形包围示例", image);

		waitKey(0);
	}

	return 0;
}
Python版本代码如下:
import cv2
import numpy as np
import random

while (True):

    # 随机生成点的数量
    count = random.randint(30,50)

    point = []
    for i in range(count):
        x = random.randint(600 / 4, 600 * 3 / 4)
        y = random.randint(600 / 4, 600 * 3 / 4)
        point.append([x,y])

    points = np.array(point, np.int32) # 点值

    # 绘制出随机颜色的点
    image = np.zeros((600, 600, 3), np.uint8)
    for i in range(count):
        cv2.circle(image,(points[i][0],points[i][1]),3, (random.randint(0,255), random.randint(0,255), random.randint(0,255)),-1)

    # 查找最小面积的包围矩形
    rect = cv2.minAreaRect(points)

    # 获取最小外接矩形的4个顶点坐标
    box = cv2.boxPoints(rect)
    box = np.int0(box)
    # 绘制出最小面积的包围矩形
    cv2.drawContours(image, [box], 0, (random.randint(0,255), random.randint(0,255), random.randint(0,255)), 1)

    cv2.imshow("image", image)
    cv2.waitKey(0)


