查找和绘制图片轮廓矩
视频讲解如下:
在本章节中给大家演示如何查找和绘制图片的轮廓矩,当前代码同样的是在毛星云的代码基础上进行扩展优化的。
C#、C++、Python三种版本的效果其实是一样的,但我这里还是单独做了演示。
当前系列所有demo下载地址:
https://github.com/GaoRenBao/OpenCv4-Demo
不同编程语言对应的OpenCv版本以及开发环境信息如下:
语言 | OpenCv版本 | IDE |
C# | OpenCvSharp4.4.8.0.20230708 | Visual Studio 2022 |
C++ | OpenCv-4.5.5-vc14_vc15 | Visual Studio 2022 |
Python | OpenCv-Python (4.6.0.66) | PyCharm Community Edition 2022.1.3 |
首先呢,我们需要准备一张测试图片。(不想下载工程的童鞋,可直接复制下面的图片和代码)

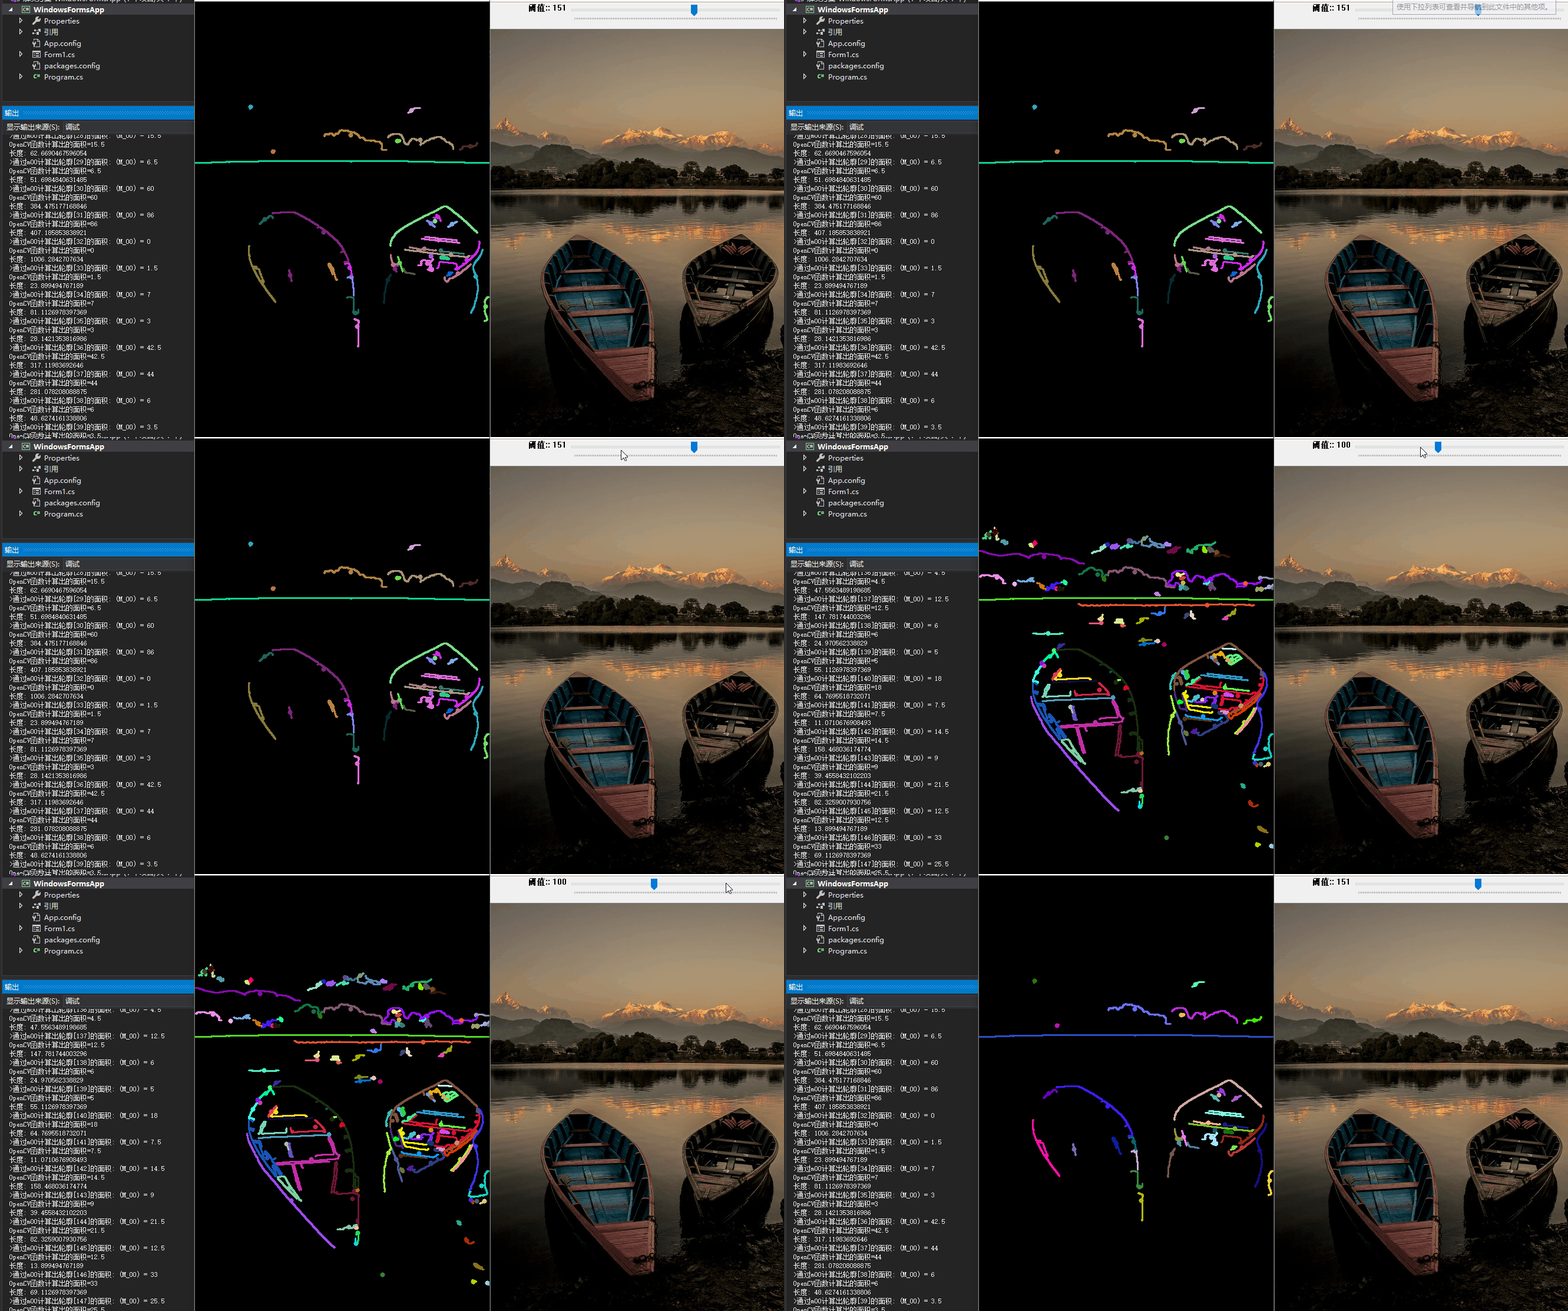
C#的演示效果如下,左侧是计算结果的输出,中间是图像效果,右侧是滑动条窗口。

C#版本代码如下:
C#版本需要安装“OpenCvSharp4”、“OpenCvSharp4.runtime.win”两个库才行。不然会报错。
如果需要使用“ BitmapConverter.ToBitmap”操作,则需要追加安装“OpenCvSharp4.Extensions”库。
using OpenCvSharp;
using System;
using System.Collections.Generic;

namespace demo
{
    internal class Program
    {
        static Mat g_cannyMat_output = new Mat();
        static Mat g_grayImage = new Mat();
        static int g_nThresh = 100;
        static RNG rng = new RNG(12345);

        static void Main(string[] args)
        {
            //【1】载入3通道的原图像
            Mat src = Cv2.ImRead("../../../images/lake2.jpg");
            if (src.Empty())
            {
                Console.WriteLine("Could not open or find the image!");
                return;
            }
            //【2】得到原图的灰度图像并进行平滑
            Cv2.CvtColor(src, g_grayImage, ColorConversionCodes.BGR2GRAY);
            Cv2.Blur(g_grayImage, g_grayImage, new Size(3, 3));

            //【3】创建原始图窗口并显示
            Cv2.NamedWindow("Source", WindowFlags.AutoSize);
            Cv2.ImShow("Source", src);

            //【4】设置滚动条并调用一次回调函数
            Cv2.CreateTrackbar("阈值:", "Source", ref g_nThresh, 255, thresh_callback);
            thresh_callback(0, IntPtr.Zero);
            Cv2.WaitKey();
        }

        private static void thresh_callback(int pos, IntPtr userData)
        {
            // 使用Canndy检测边缘
            Cv2.Canny(g_grayImage, g_cannyMat_output, g_nThresh, g_nThresh * 2, 3);

            // 找出轮廓
            Point[][] g_vContours;
            HierarchyIndex[] g_vHierarchy;
            Cv2.FindContours(g_cannyMat_output, out g_vContours, out g_vHierarchy, RetrievalModes.Tree, ContourApproximationModes.ApproxSimple);

            // 计算矩
            List<Moments> mu = new List<Moments>();
            for (int i = 0; i < g_vContours.Length; i++)
            {
                mu.Add(Cv2.Moments(g_vContours[i], false));
            }

            // 计算中心矩
            List<Point> mc = new List<Point>();
            for (int i = 0; i < g_vContours.Length; i++)
            {
                mc.Add(new Point((float)(mu[i].M10 / mu[i].M00), (float)(mu[i].M01 / mu[i].M00)));
            }

            // 绘制轮廓
            Mat drawing = Mat.Zeros(g_cannyMat_output.Size(), MatType.CV_8UC3);
            for (int i = 0; i < g_vContours.Length; i++)
            {
                // 随机设置颜色
                Scalar color = new Scalar(rng.Uniform(0, 255), rng.Uniform(0, 255), rng.Uniform(0, 255));
                // 绘制外层和内层轮廓
                Cv2.DrawContours(drawing, g_vContours, (int)i, color, 2, LineTypes.Link8, g_vHierarchy, 0, new Point());
                //绘制圆
                Cv2.Circle(drawing, mc[i], 4, color, -1, LineTypes.Link8, 0);
            }

            // 通过m00计算轮廓面积并且和OpenCV函数比较
            System.Diagnostics.Debug.WriteLine("\t输出内容: 面积和轮廓长度\n");
            for (int i = 0; i < g_vContours.Length; i++)
            {
                System.Diagnostics.Debug.WriteLine($">通过m00计算出轮廓[{i}]的面积: (M_00) = {mu[i].M00}");
                System.Diagnostics.Debug.WriteLine($"OpenCV函数计算出的面积={Cv2.ContourArea(g_vContours[i])}");
                System.Diagnostics.Debug.WriteLine($"长度: {Cv2.ArcLength(g_vContours[i], true)}");
                Scalar color = new Scalar(rng.Uniform(0, 255), rng.Uniform(0, 255), rng.Uniform(0, 255));
                Cv2.DrawContours(drawing, g_vContours, i, color, 2, LineTypes.Link8, g_vHierarchy, 0, new Point());
                Cv2.Circle(drawing, mc[i], 4, color, -1, LineTypes.Link8, 0);
            }

            Cv2.ImShow("Contours", drawing);
        }
    }
}
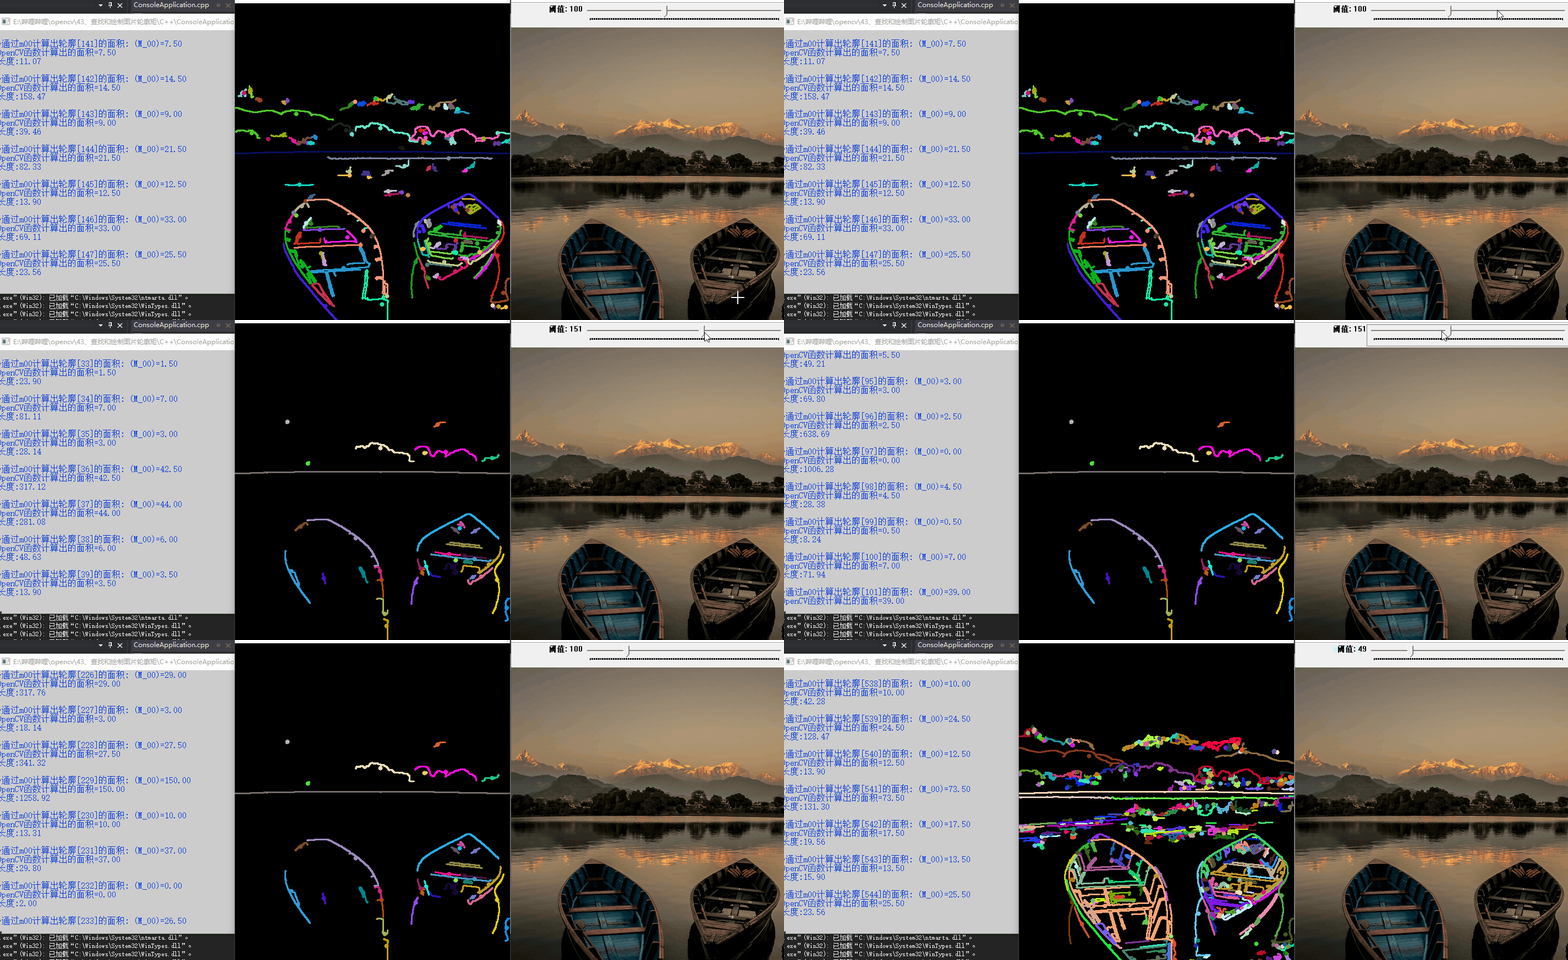
C++的演示效果如下,左侧是计算结果的输出,中间是图像效果,右侧是滑动条窗口。

C++版本代码如下:
#include "opencv2/highgui/highgui.hpp"
#include "opencv2/imgproc/imgproc.hpp"
#include <iostream>
using namespace cv;
using namespace std;

#define WINDOW_NAME1 "【原始图】"     //为窗口标题定义的宏
#define WINDOW_NAME2 "【图像轮廓】"   //为窗口标题定义的宏

Mat g_srcImage; Mat g_grayImage;
int g_nThresh = 100;
int g_nMaxThresh = 255;
RNG g_rng(12345);
Mat g_cannyMat_output;
vector<vector<Point> > g_vContours;
vector<Vec4i> g_vHierarchy;

void on_ThreshChange(int, void*)
{
    // 使用Canndy检测边缘
    Canny(g_grayImage, g_cannyMat_output, g_nThresh, g_nThresh * 2, 3);

    // 找到轮廓
    findContours(g_cannyMat_output, g_vContours, g_vHierarchy, RETR_TREE, CHAIN_APPROX_SIMPLE, Point(0, 0));

    // 计算矩
    vector<Moments> mu(g_vContours.size());
    for (unsigned int i = 0; i < g_vContours.size(); i++)
    {
        mu[i] = moments(g_vContours[i], false);
    }

    //  计算中心矩
    vector<Point2f> mc(g_vContours.size());
    for (unsigned int i = 0; i < g_vContours.size(); i++)
    {
        mc[i] = Point2f(static_cast<float>(mu[i].m10 / mu[i].m00), static_cast<float>(mu[i].m01 / mu[i].m00));
    }

    // 绘制轮廓
    Mat drawing = Mat::zeros(g_cannyMat_output.size(), CV_8UC3);
    for (unsigned int i = 0; i < g_vContours.size(); i++)
    {
        Scalar color = Scalar(g_rng.uniform(0, 255), g_rng.uniform(0, 255), g_rng.uniform(0, 255));//随机生成颜色值
        drawContours(drawing, g_vContours, i, color, 2, 8, g_vHierarchy, 0, Point());//绘制外层和内层轮廓
        circle(drawing, mc[i], 4, color, -1, 8, 0);;//绘制圆
    }

    // 显示到窗口中
    namedWindow(WINDOW_NAME2, WINDOW_AUTOSIZE);
    imshow(WINDOW_NAME2, drawing);

    // 通过m00计算轮廓面积并且和OpenCV函数比较
    printf("\t 输出内容: 面积和轮廓长度\n");
    for (unsigned int i = 0; i < g_vContours.size(); i++)
    {
        printf(">通过m00计算出轮廓[%d]的面积: (M_00)=%.2f\n", i, mu[i].m00);
        printf("OpenCV函数计算出的面积=%.2f\n", contourArea(g_vContours[i]));
        printf("长度:%.2f\n\n", arcLength(g_vContours[i], true));

        Scalar color = Scalar(g_rng.uniform(0, 255), g_rng.uniform(0, 255), g_rng.uniform(0, 255));
        drawContours(drawing, g_vContours, i, color, 2, 8, g_vHierarchy, 0, Point());
        circle(drawing, mc[i], 4, color, -1, 8, 0);
    }
}

int main(int argc, char** argv)
{
    //【0】改变console字体颜色
    system("color 71");

    // 读入原图像, 返回3通道图像数据
    g_srcImage = imread("../images/lake2.jpg", 1);

    // 把原图像转化成灰度图像并进行平滑
    cvtColor(g_srcImage, g_grayImage, COLOR_BGR2GRAY);
    blur(g_grayImage, g_grayImage, Size(3, 3));

    // 创建新窗口
    namedWindow(WINDOW_NAME1, WINDOW_AUTOSIZE);
    imshow(WINDOW_NAME1, g_srcImage);

    //创建滚动条并进行初始化
    createTrackbar(" 阈值", WINDOW_NAME1, &g_nThresh, g_nMaxThresh, on_ThreshChange);
    on_ThreshChange(0, 0);

    waitKey(0);
    return(0);
}
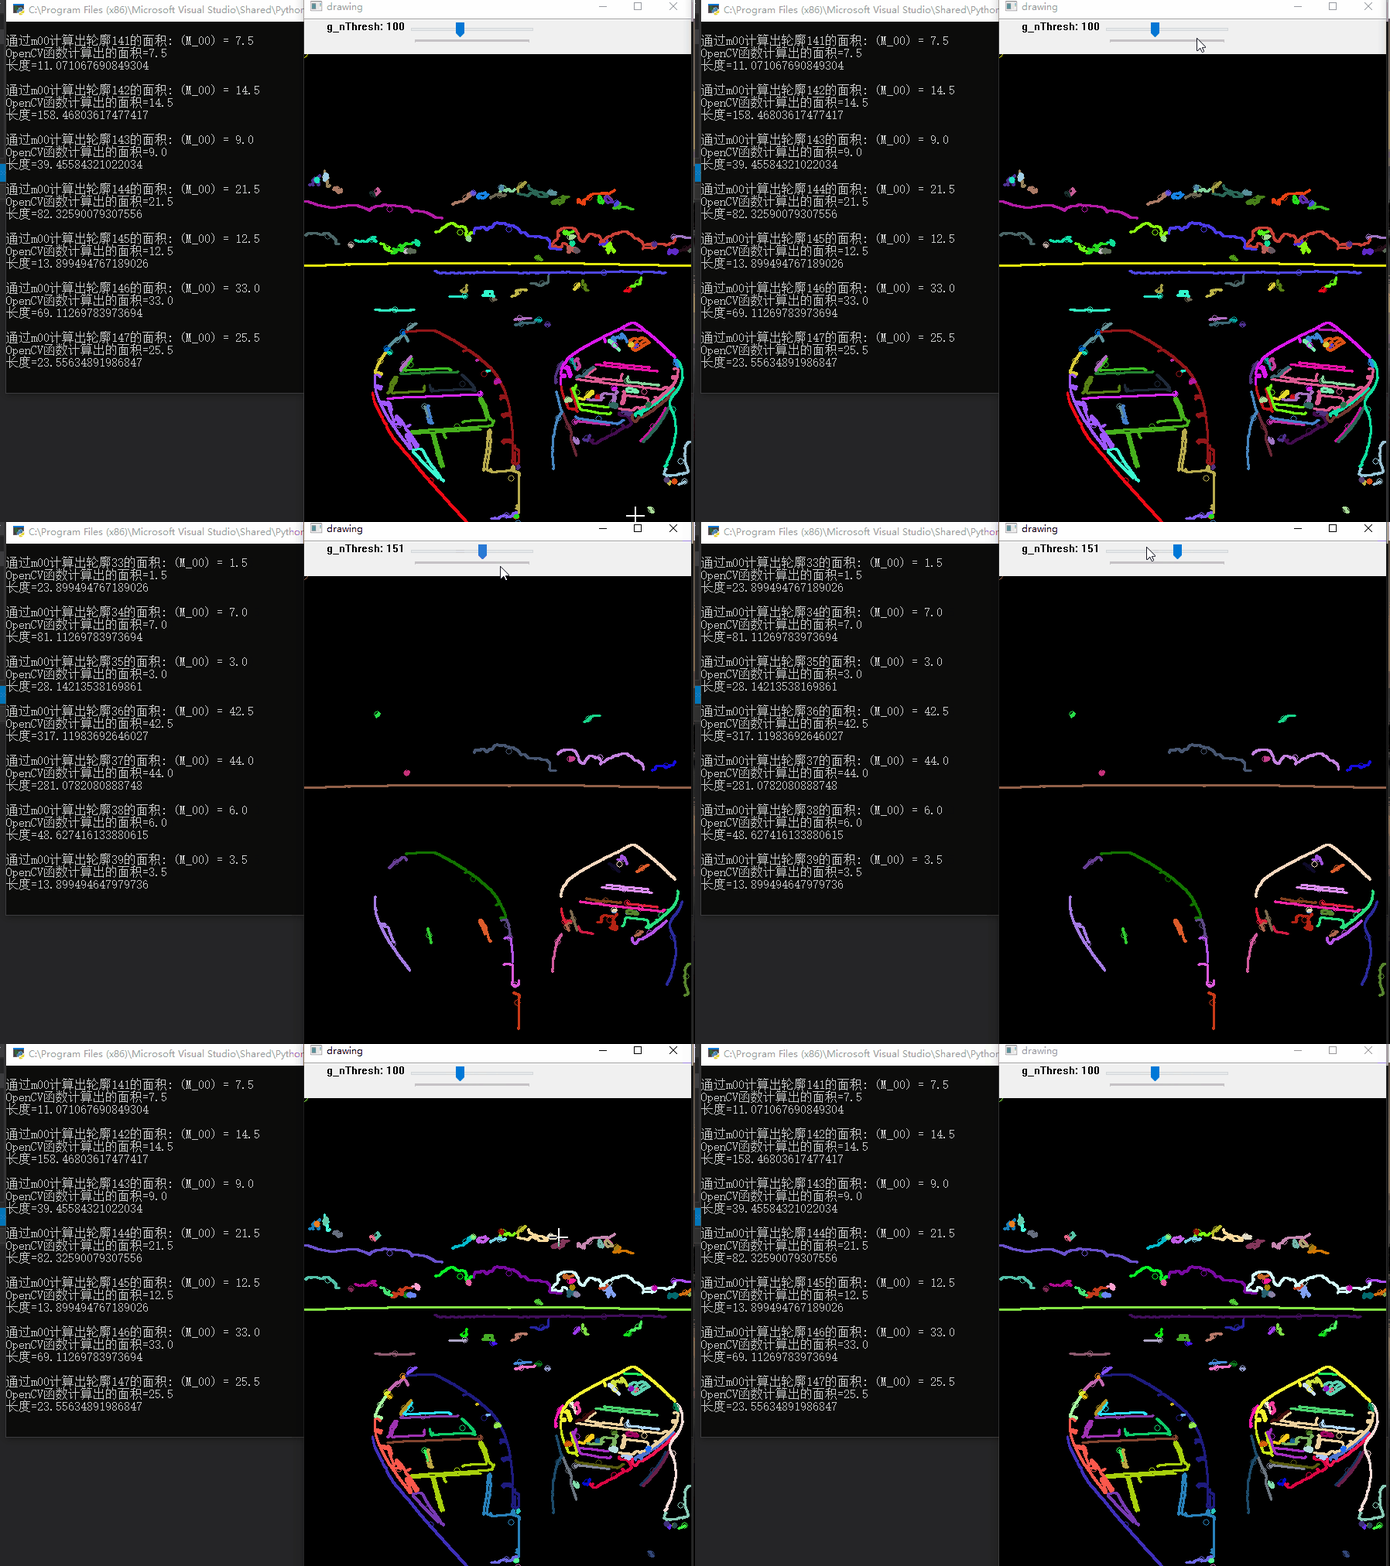
Python的演示效果如下,左侧是计算结果的输出,右侧是图像效果和滑动条窗口。

Python版本代码如下:
import cv2
import numpy as np
import random

g_nThresh = 100

def on_ThreshChange(x):
    global g_nThresh, g_grayImage, drawing

      # 获取滑动条的值
    g_nThresh = cv2.getTrackbarPos('g_nThresh', 'drawing')

    g_cannyMat_output=cv2.Canny(g_grayImage,g_nThresh,g_nThresh*2,3)

    # 找出轮廓
    g_vContours, g_vHierarchy  = cv2.findContours(g_cannyMat_output,cv2.RETR_TREE,cv2.CHAIN_APPROX_SIMPLE)

    # 计算矩
    mu = []
    for i in range(len(g_vContours)):
        mu.append(cv2.moments(g_vContours[i]))

    # 计算中心矩
    mc = []
    for i in range(len(g_vContours)):
        if mu[i]['m00'] != 0 :
            mc.append((int(mu[i]['m10'] / mu[i]['m00']), int(mu[i]['m01'] / mu[i]['m00'])))
        else:
            mc.append((0, 0))

    # 绘制轮廓
    drawing = np.zeros((g_cannyMat_output.shape[0], g_cannyMat_output.shape[1], 3), np.uint8)
    for i in range(len(g_vContours)):
        # 随机设置颜色
        color = (random.randint(0,255), random.randint(0,255), random.randint(0,255))
        # 绘制外层和内层轮廓
        cv2.drawContours(drawing, g_vContours, i, color, 2, 8, g_vHierarchy, 0)
        # 绘制圆
        cv2.circle(drawing, mc[i], 4, color ,1, 8, 0)

    print("输出内容: 面积和轮廓长度")
    for i in range(len(g_vContours)):
        # 随机设置颜色
        color = (random.randint(0,255), random.randint(0,255), random.randint(0,255))
        print("通过m00计算出轮廓" + str(i) + "的面积: (M_00) = " + str(mu[i]["m00"]))
        print("OpenCV函数计算出的面积=" + str(cv2.contourArea(g_vContours[i])))
        print("长度=" + str(cv2.arcLength(g_vContours[i], True)) + "\n")

        cv2.drawContours(drawing, g_vContours, i, color, 2, 8, g_vHierarchy, 0)
        cv2.circle(drawing, mc[i], 4, color ,1, 8, 0)

# 载入3通道的原图像
g_srcImage = cv2.imread("../images/lake2.jpg")
# 得到原图的灰度图像并进行平滑
g_grayImage = cv2.cvtColor(g_srcImage, cv2.COLOR_BGR2GRAY)
# 均值滤波
g_grayImage = cv2.blur(g_grayImage, (3,3))
cv2.imshow("g_srcImage", g_srcImage)

# 初始化一个空白图像
drawing = np.zeros((g_grayImage.shape[0], g_grayImage.shape[1], 3), np.uint8)

# 创建窗口
cv2.namedWindow('drawing')
cv2.createTrackbar('g_nThresh', 'drawing', 0, 255, on_ThreshChange)
cv2.setTrackbarPos('g_nThresh', 'drawing', 100)

while (True):
    cv2.imshow("drawing", drawing)
    if cv2.waitKey(10) == ord('q'):
        break
cv2.destroyAllWindows()


