YOLOv5 C++进行模型预测
博主的工程源码下载:
链接:https://pan.baidu.com/s/1cJK7QQ8WrcyWIWHE8d_F6A
提取码:h4du
解压密码:www.bilibili996.com
开发环境说明:
系统:windows 10
IDE:Visual Studio 2022
GitHub源码下载:https://github.com/Hexmagic/ONNX-yolov5
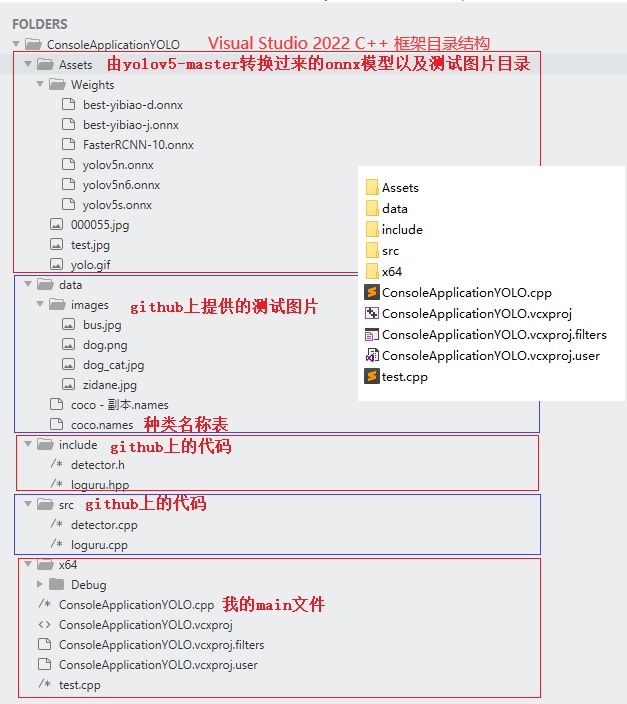
GitHub上的源码时linux环境下的,不过windows下也一样能用,我的目录结构如下:

yolov5 的pt文件转onnx以及转换的注意事项,可以参考《YOLOv5 C#中进行模型预测(.net版)》文章。
如果想使用自己的模型,记得将coco.names文件改成自己的模型名称表。
C++ main函数的主要代码如下:
#include <opencv2/opencv.hpp>
#include <opencv2/imgproc/imgproc.hpp>
#include <iostream>
#include <string>
#include <vector>
#include <fstream>
#include "include/loguru.hpp"
#include "include/detector.h"

using namespace cv;
using namespace std;

int main()
{
    string model_path = "Assets/Weights/best-yibiao-j.onnx";
    string img_path = "Assets/000055.jpg";
    Config config = { 0.25f, 0.45f, model_path, "data/coco.names", Size(640, 640),false };
    LOG_F(INFO, "Start main process");
    Detector detector(config);
    LOG_F(INFO, "Load model done ..");
    Mat img = imread(img_path, IMREAD_COLOR);
    LOG_F(INFO, "Read image from %s", img_path.c_str());
    Detection detection = detector.detect(img);
    LOG_F(INFO, "Detect process finished");
    Colors cl = Colors();
    detector.postProcess(img, detection, cl); // 显示识别区域
    return 0;
}
注意事项:
GitHub上的源码某些函数好像被弃用了,windows上运行会有报错提示,需要做升级修改,修改主要三个文件:detector.cpp、loguru.cpp、detector.h,文件差异如下:
detector.h文件修改如下:

detector.cpp修改如下:

loguru.cpp修改如下:

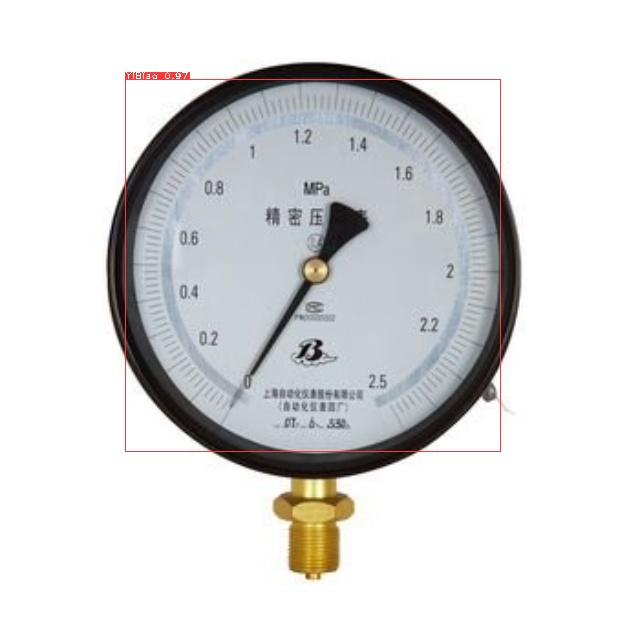
运行效果如下:


