Detectron2 环境搭建
运行环境说明:
电脑环境:windows 11专业版
IDE:PyCharm Community Edition 2022.2.3
Python版本:Python 3.10
1、搭建虚拟环境
搭建虚拟环境的方法可以参考《YOLOv5安装开发环境》。
注意:
1、在《YOLOv5安装开发环境》中,tensorflow-cpu安装的版本是2.3.0,目前这个版本已经安装不了了,博主这里安装的是最新版2.11.0
2、在《YOLOv5安装开发环境》中,python版本用的是3.8,我这边用的是3.10,这个要注意一下。
创建虚拟环境
conda create -n detectron python==3.10 // 创建虚拟环境
conda activate detectron // 进入虚拟环境
通用数据包安装:
备用地址:https://pypi.tuna.tsinghua.edu.cn/simple
pip install tensorflow-cpu==2.11.0 -i https://mirror.baidu.com/pypi/simple
pip install pyqt5 pillow opencv-python matplotlib -i https://mirror.baidu.com/pypi/simple
以下数据包是运行Detectron2所必须的
pip install pycocotools==2.0.6 -i https://mirror.baidu.com/pypi/simple
pip install iopath==0.1.9 -i https://mirror.baidu.com/pypi/simple
pip install yacs -i https://mirror.baidu.com/pypi/simple
pip install black -i https://mirror.baidu.com/pypi/simple
pip install tabulate -i https://mirror.baidu.com/pypi/simple
pip install cloudpickle -i https://mirror.baidu.com/pypi/simple
pip install tqdm -i https://mirror.baidu.com/pypi/simple
pip install fvcore -i https://mirror.baidu.com/pypi/simple
pip install omegaconf -i https://mirror.baidu.com/pypi/simple
pip install hydra-core -i https://mirror.baidu.com/pypi/simple
pip install matplotlib -i https://mirror.baidu.com/pypi/simple
pip install torch -i https://mirror.baidu.com/pypi/simple
pip install ninja
注意事项:
1、安装ninja时,不要带上数据源,直接用系统默认数据源安装,不然可能会编译失败!
2、torch一定要安装,不要觉得,我已经安装torch==1.13.0+cu117了,torch就可以不用安装了,如果不安装,会报下面这个错误!

2、下载官方代码
官方代码下载地址:https://github.com/facebookresearch/detectron2
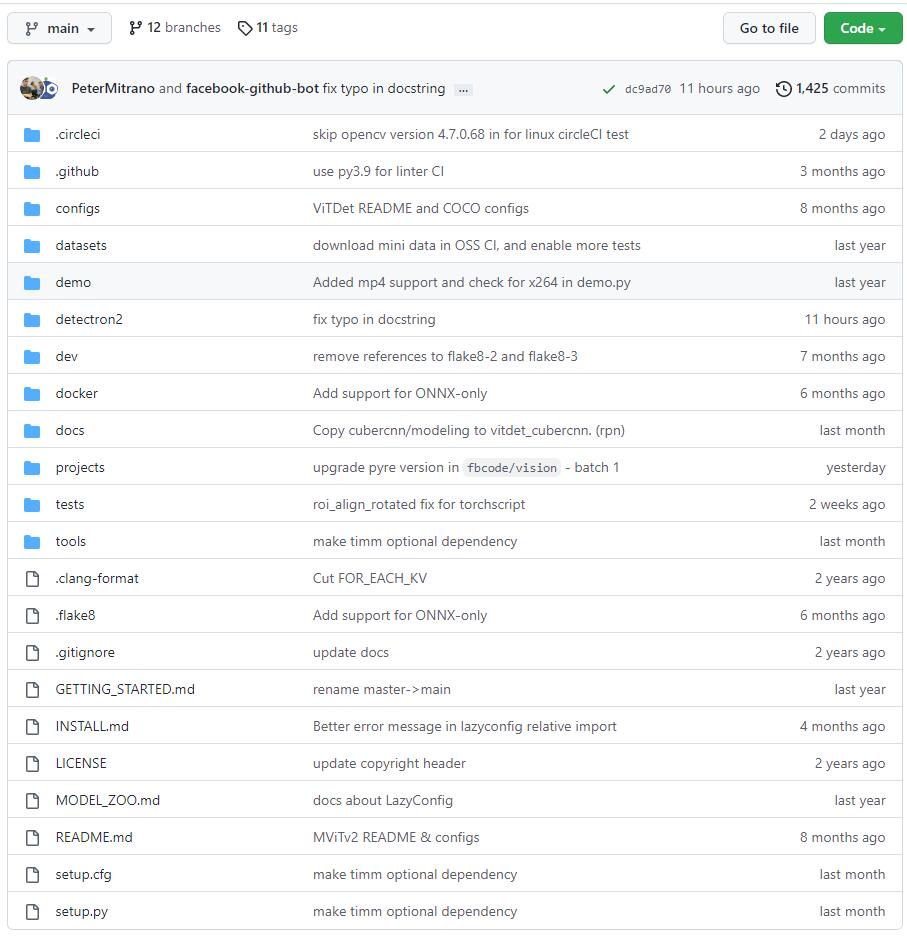
下载完成之后,将压缩包解压到一个非中文目录下面,然后使用PyCharm打开工程。
3、配置工程环境
避坑说明:
在博客 https://blog.csdn.net/iracer/article/details/125755029 中,说是要修改各种文件、安装各种组件,其实都完全没必要,安装之后反而无法编译源码,坑死我了。。。
将前面安装好的虚拟环境添加到我们的环境中。

在上一章节中,我们已经安装好了CUDA11.7,这里直接打开终端,安装对应版本的torch和torchvision即可。
安装命令如下:
pip install torch==1.13.0+cu117 torchvision==0.14.0+cu117 -f https://download.pytorch.org/whl/torch_stable.html
安装完成之后,我们就能看到我们安装的软件包了。

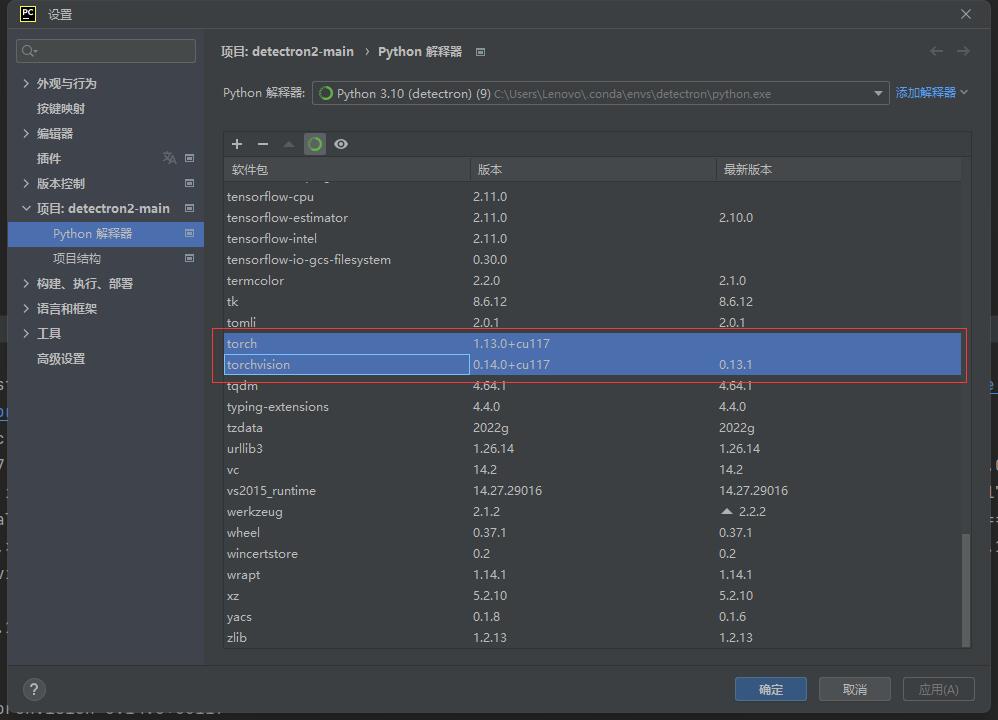
此时,如果直接进行源码编译,会报下面这个错误:
注意:部分电脑环境不进行任何修改也能编译成功,在决定是否修改之前,请先进行编译尝试,以便确定是否需要进行相应的修改。。。

解决方案如下:
参考博客:https://blog.csdn.net/qq_21532607/article/details/128075997
打开文件“..\envs\detectron\Lib\site-packages\torch\include\ATen\Parallel.h”
将32行
inline TORCH_API void lazy_init_num_threads() {替换成
inline void lazy_init_num_threads() {
4、源码编译
记得在虚拟环境下执行下面命令,进行编译
python setup.py build develop
注意:如果要重新编译,记得删除“detectron2-main\build\”目录下的文件,避免不必要的错误。
第一次编译时,会下载东西,如果网络不好,可能会编译超时,如下:

解决办法是,直接带上数据源地址进行编译:
python setup.py build develop -i https://mirror.baidu.com/pypi/simple
编译结果如下:
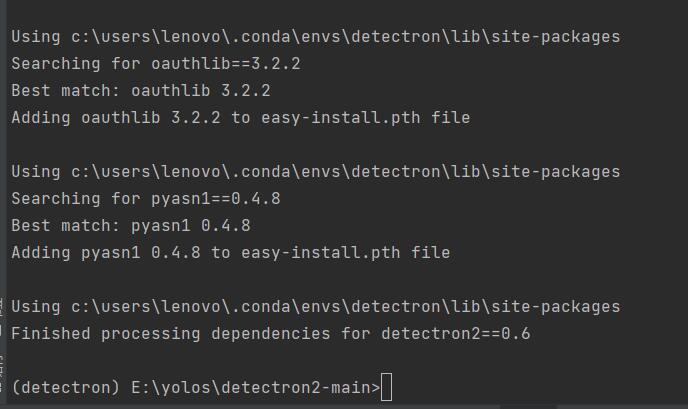
5、运行测试
运行测试参考博客(不推荐该博客的安装方法,不能用):https://blog.csdn.net/iracer/article/details/125755029?spm=1001.2014.3001.5501
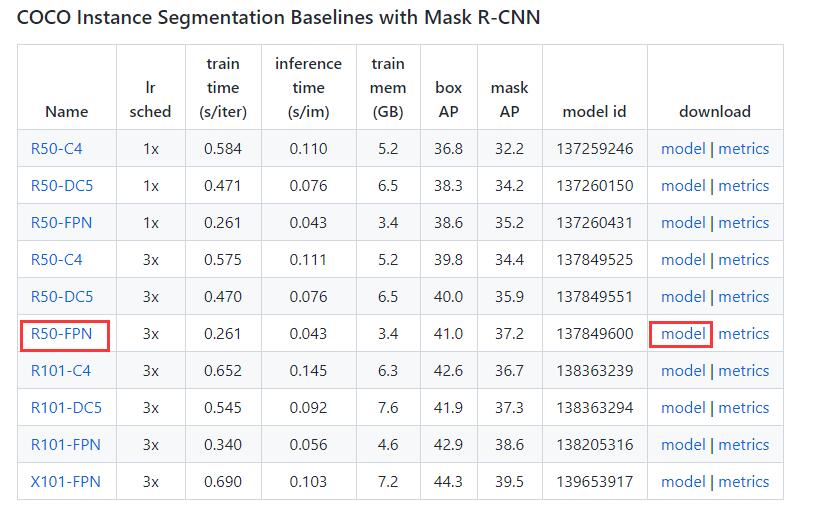
去github上下载需要的测试模型:https://github.com/facebookresearch/detectron2/blob/main/MODEL_ZOO.md
1、选择model zoo中一个模型下载用于测试
2、注意1个模型需要下载2个文件:
1)表格第1列模型名称右键另存的是 [*.yaml] 模型描述文件
2)表格倒数第2列model按钮右键另存为的是 [*.pkl] 权重文件
3、下载权重文件*.pkl
例如,下载模型权重文件为:model_final_f10217.pkl
在detectron2-main下新建一个models目录存放下载的模型权重(也可以放其他地方)。
就像这样“detectron2-main\models\model_final_f10217.pkl”,模型多了,当然你可以再建个子文件夹做区分。
4、下载网络结构文件*.yaml
例如,下载模型结构文件为:mask_rcnn_R_50_FPN_3x.yaml
将上述文件拷贝到detectron2-main\configs中合适的文件夹下
说明:官方代码里面其实已经自带了很多模型文件,博主这里其实并没有下载yaml文件,博主是直接使用的自带yaml文件。
进到github中,博主主要下载的是下面两个连接文件。
5、准备一些测试用的图片,放到“detectron2-main\demo\images”目录下面

然后执行测试命令(测试图片3.jpg):
GPU模式:
python demo/demo.py --config-file configs/COCO-InstanceSegmentation/mask_rcnn_R_50_FPN_3x.yaml --input demo/images/3.jpg --opts MODEL.WEIGHTS models/model_final_f10217.pkl
CPU模式:
python demo/demo.py --config-file configs/COCO-InstanceSegmentation/mask_rcnn_R_50_FPN_3x.yaml --input demo/images/1.jpg --opts MODEL.WEIGHTS models/model_final_f10217.pkl MODEL.DEVICE cpu
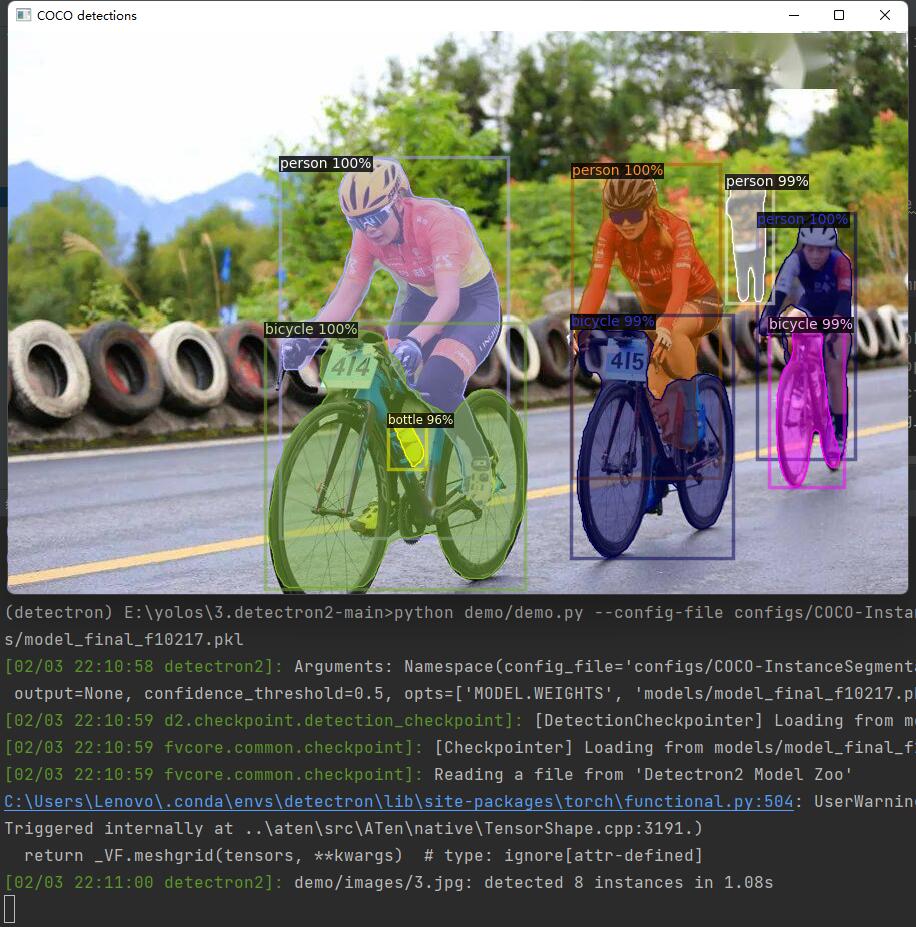
注意:如果发现显示的图片大小和实际的不一致,可以尝试将“detectron2-main/demo/demo.py”文件中的所有“cv2.namedWindow”方法给屏蔽掉!!


